Rodeostat firmware guide
In this set of notes we describe how to download, build and install the latest version of the firmware for your Rodeostat.
The firmware for the Rodeostat is written in C++ and runs on the 32-bit ARM microcontroller on the Teensy 3.2 development board which is part of the Rodeostat. It provides low-level control of the device hardware - such as controlling amplifier gains, setting the output voltage during tests, reading analog inputs, and communicating with the host computer over USB. The firmware is distributed as an Arduino sketch in combination with an Arduino library and as such it can be built (compiled) and uploaded (to the hardware) using the Arduino IDE (Integrated Development Environment).
Installing the Arduino IDE
Prior to building and installing the Rodeostat firmware you will need to download and install the Arduino IDE. We suggest using the latest version of the Arduino IDE if possible - at the time we are writing this is version 2.0.3. At very minimum we suggest using a version >= 2.0 because with the newer versions of the IDE the Teensy series development boards have been added to the IDE's Boards Manager and a separate installer is no longer required.
The Arduino IDE can be downloaded from the link below.
Instructions for downloading and installing the Arduino IDE can be found here
Adding support for Teensy
After you have downloaded and installed the Arduino IDE the next step is to use the Boards Manager to add support for the Teensy series development boards.
Before starting make sure the Rodeostat cable is not plugged into your computers USB port.
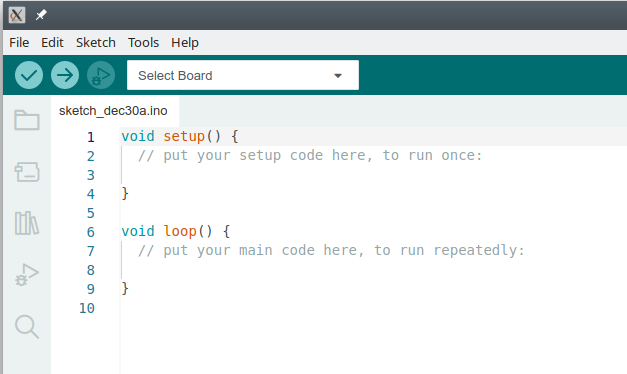
Step 1. Start the Arduino IDE. You should be presented with a screen which looks like the one below.
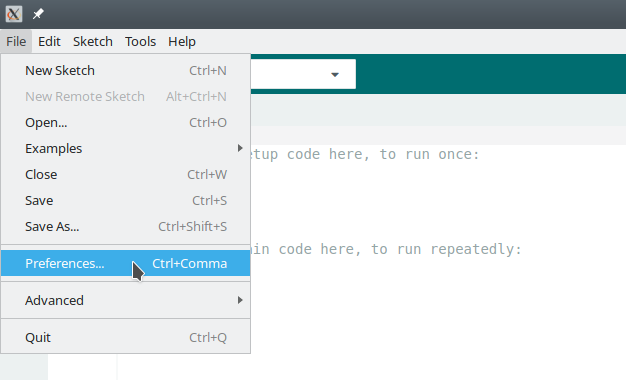
Step 2. Go to File menu and locate the Preferences menu item.
Click on Preferences to open the Preferences dialog. This will open a window like the one shown below. Locate the textbox labeled Additional Boards Manager URLs. Add the following URL to this textbox.
https://www.pjrc.com/teensy/package_teensy_index.jsonAfter you are done the Preferences dialog should look like the image below.
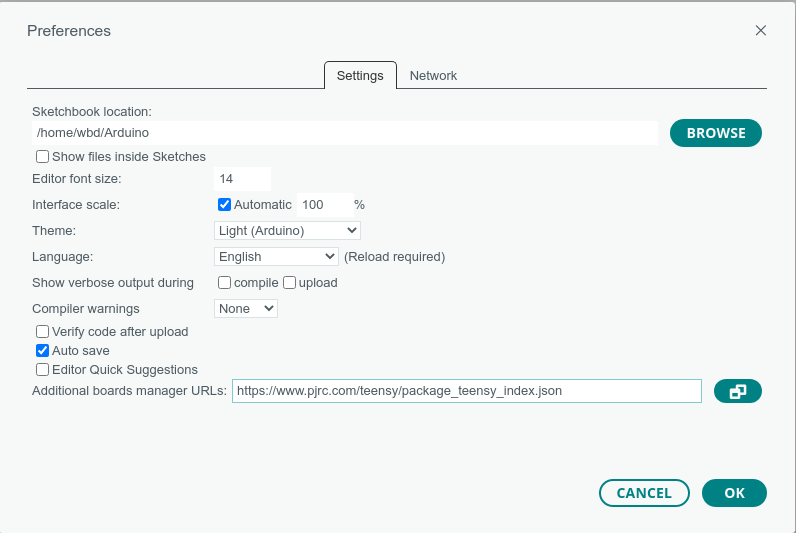
Click OK when you are finished to exit the dialog.
Step 4. Locate the Boards Manager icon on the left side of the IDE's window.
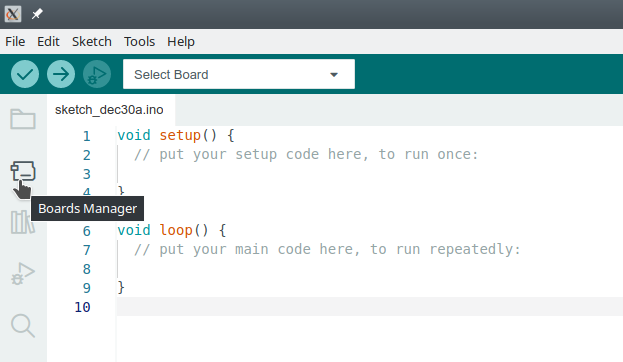
Click on this icon to open the Boards Manager.
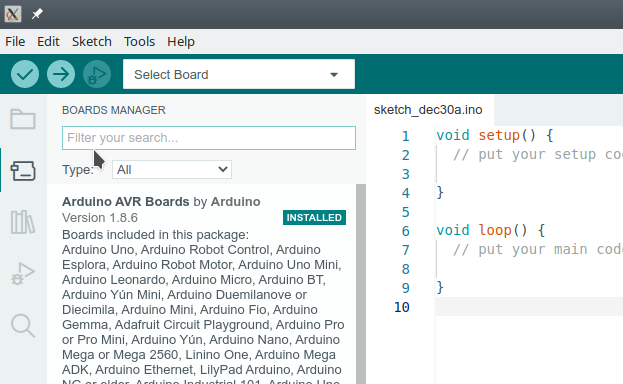
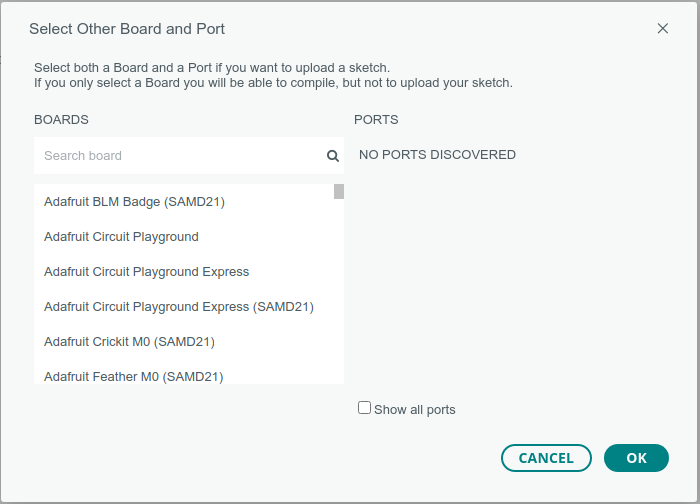
Search for "teensy" using the Boards Manager's search tool.
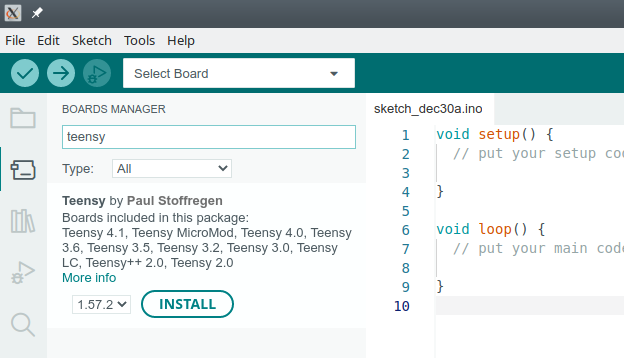
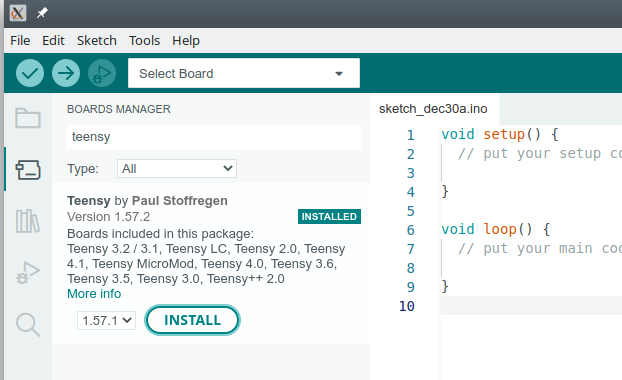
Click install to add the Teensy series development boards to the IDE. This will take a little time. When it is completed the word INSTALLED will appear on the Teensy entry in the Boards manger window.
When you are done you can click on the Boards Manager icon to hide the Boards Manager window.
Step 5. Now that the Teensy development boards have been added the Arduino IDE you should be able to find them in the IDE's Board Selection drop down menu. This menu can be found in the toolbar near the top of the IDE window - just below the menus. The dialog will have some text in - such as Select Board or the name of a recently used board such as Arduino Uno, etc. as show below.
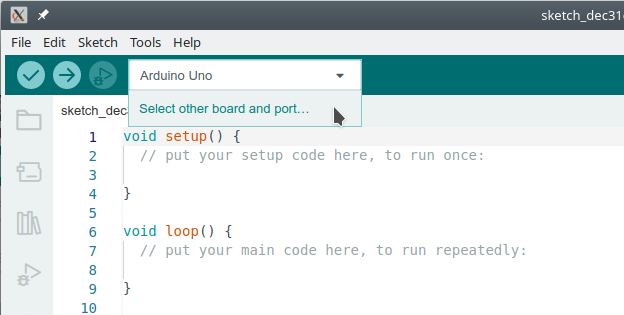
Click on this drop down menu and choose the Select other board and port ... option. This will open the Board/Port Selection Dialog.
In the BOARDS search window enter the text "teensy" and then select the Teensy 3.2/3.1 option from the menu as shown below.
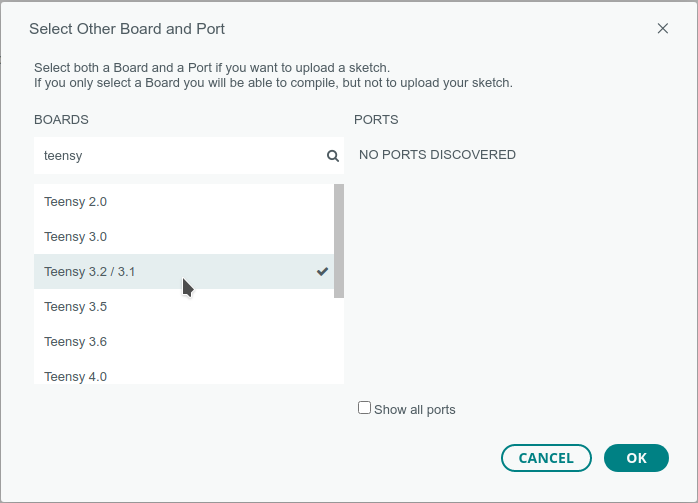
Click OK to exit the Board/Port Selection dialog when done. The Board Selection drop down should now have the text Teensy 3.2/3.1 in it. You have now completed adding support for Teensy to the Arduino IDE.
Download the Rodeostat firmware
The next step is download the latest firmware for the Rodeostat. This can be found in the project's Github repository at the link below.
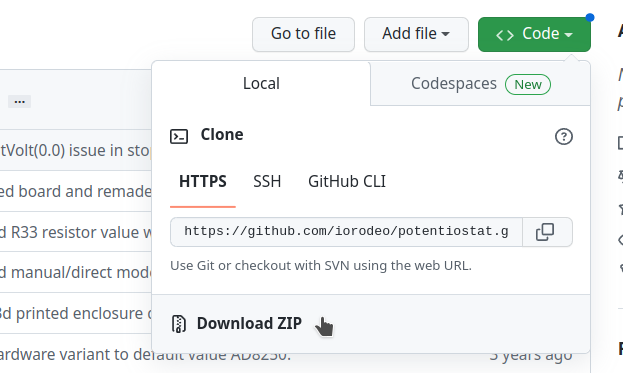
 iorodeo
To download the latest version of the repository as a .zip file, go to the Code drop down menu and select the Download ZIP option as shown below.
The .zip archive of the repository will be downloaded to your computer into your browser's current Downloads location. The .zip downloaded file will be named something like potentiostat-master.zip. Unzip this archive to some convenient location on your computer. Enter the top level directory of the unzipped archive.
Once you have downloaded and extracted (or cloned using git) the latest version of the project's repository, the top level directory of the project should look similar to the image below.
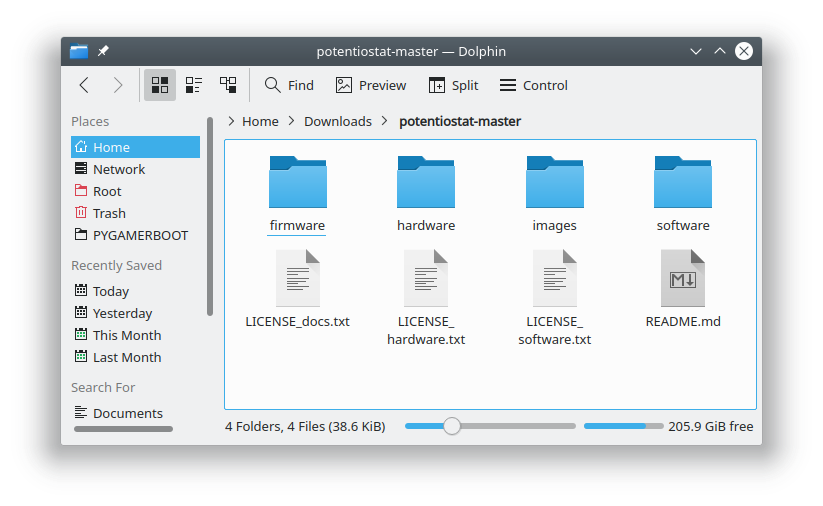
In this directory you should see a sub-directory named firmware. This folder contains the latest version of the Arduino sketch and Arduino library for the Rodeostat.
Building and uploading the firmware
Next we will build the firmware using the Arduino IDE and upload the firmware to the Teensy 3.2 on the Rodeostat.
Step 1. Set the sketchbook location. The first thing we need to do is set the Arduino IDE's sketchbook location so that it can find the required libraries for the Rodeostat. To do this return to the Preferences dialog by clicking on Preferences in the File menu of in the Arduino IDE.

Set the sketchbook location to the firmware sub-directory of the Rodeostat project repository - which we downloaded from Github in the previous step - by entering the location into the textbox or using the BROWSE dialog located on the right hand side of the dialog's window. When you are done it should look similar to the image below.
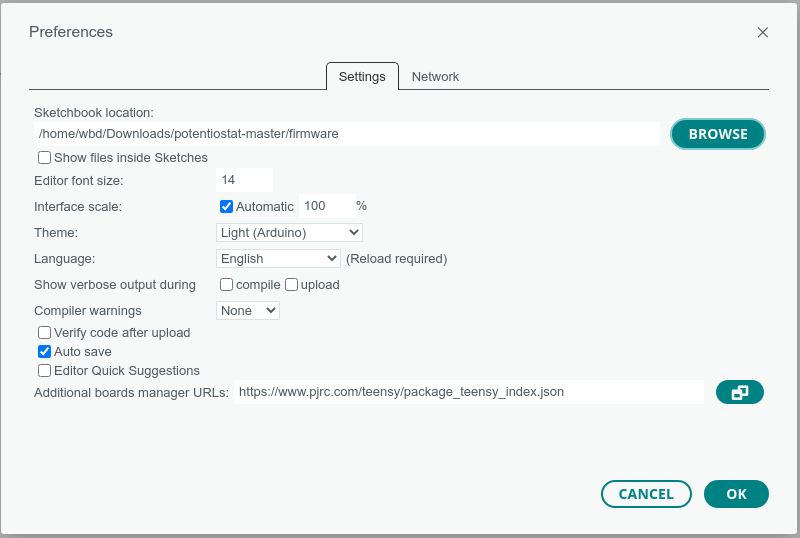
Click OK to close the dialog.
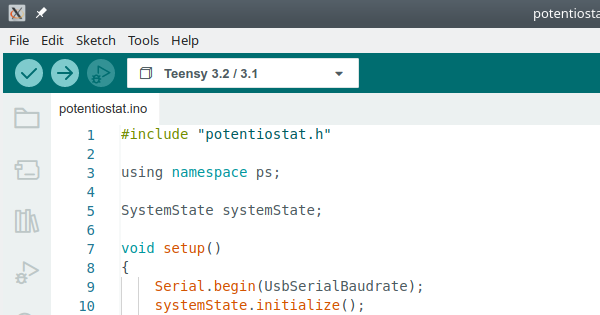
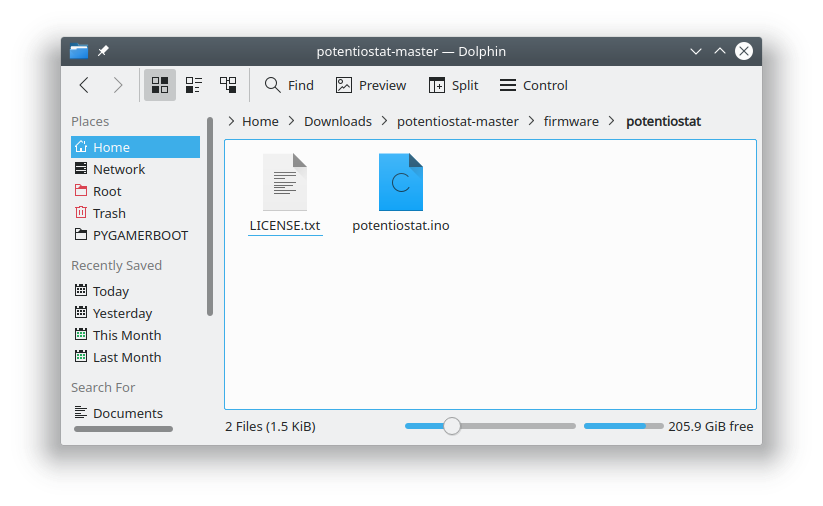
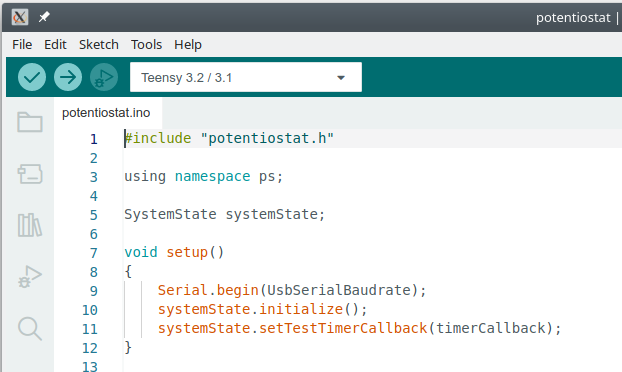
Step 2. Open the firmware sketch file. Next we need to open the sketch file for the firmware itself. This can be found in the firmware/potentiostat sub-sub-directory of the project repository and is named potentiostat.ino.
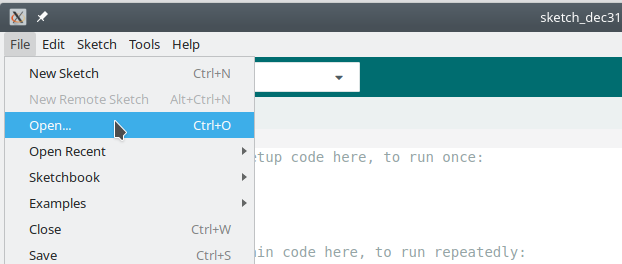
Use the Arduino IDE's File -> Open dialog to find and open this file in the IDE.
When you have opened the potentiostat.ino file the main window of the Arduino IDE should look like that the image below.
Double check to make sure that the Board Selection drop down still displays the text Teensy 3.2/3.1. This will ensure that you are building the firmware for the correct target hardware.
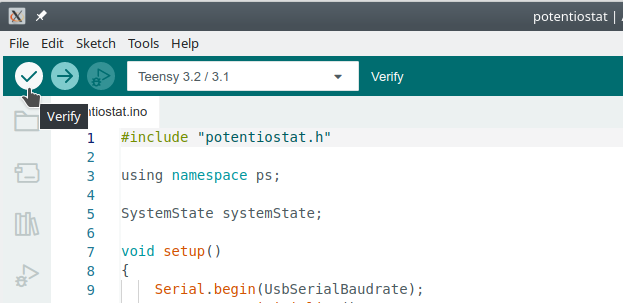
Step 3. Building the firmware. The next step is build the firmware for the Teensy 3.2 development board target. This can be done by pressing the Verify button in the upper left hand side of the top menu bar (see image below).
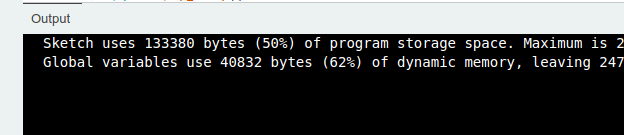
Building the firmware will take several seconds. While the sketch is compiling you will see the Compiling sketch ... message in the lower right hand corner of the Arduino IDE window.

One the sketch is done compiling this message will change to Done compiling.

If any errors occur during the build process they will be shown in the output window at the bottom of the IDE.
If there are no errors then you are ready to upload the firmware to your Rodeostat. Continue on the next section titled Uploading the firmware.
When errors do occur you will see a error popup in the lower right hand corner of the IDE window like the one below with a button for copying the error messages.

Error messages will be displayed in the Output window in orange/red text as shown below.

The first thing to do if you do encounter an error is double-check each of the previous steps to verify that all of the settings are correct e.g., sketchbook location, board selection, etc. An incorrect setting is the most common cause of an error when building the firmware.
If you need to request support, the error messages shown in the Output window can be copied to the clip board using the COPY ERROR MESSAGES button. The content of these messages can be extremely helpful when diagnosing issues remotely.
Step 4. Uploading the firmware. Once you have successfully built the firmware for the Teensy 3.2/3.1 target you are ready to upload it to your Rodeostat.
At this point you will want to make sure your Rodeostat is plugged into your computer's USB port.
Before you can upload the firmware you need do tell the Arduino IDE which port is associated with your Rodeostat. This can be done using the Board/Port Selection dialog which can be accessed using Board/Port drop down menu as shown below.
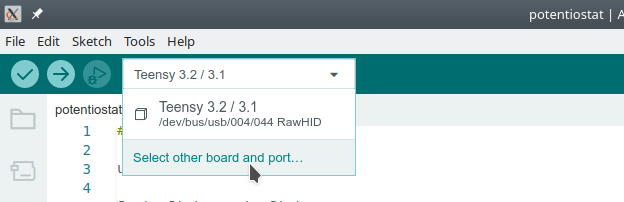
Click on "Select other board and port" to open the dialog.
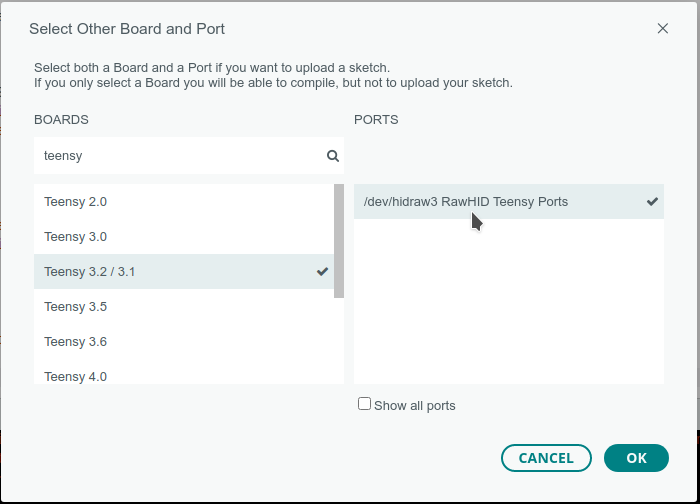
With the Rodeostat plugged into the USB port an item should appear in the PORTS list. The name may vary depending on your operating system and whether or not your Teensy has be programmed before. It may be something like RawHID Teensy Ports, or Serial Teensy Ports. Another example is shown below.
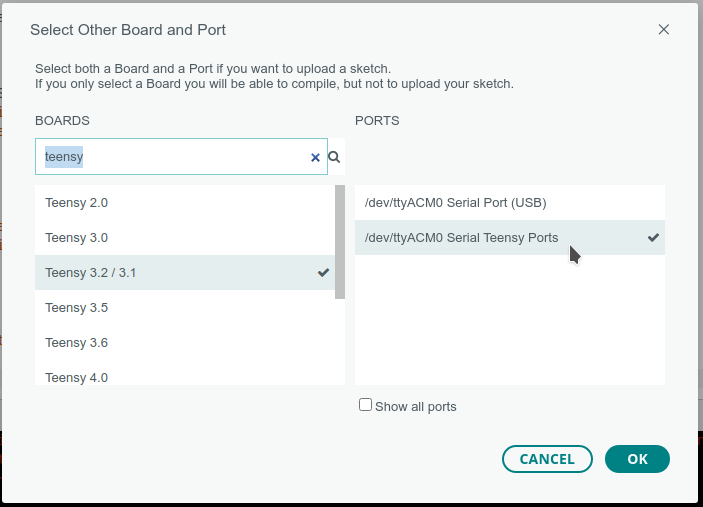
Make sure that both Teensy 3.2/3.1 under BOARDS and the Teensy item under PORTS are both selected and have a check mark next to them. Then click OK to exit the dialog.
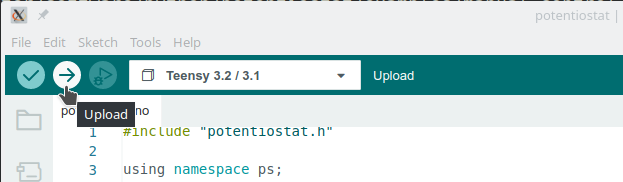
You are now ready to upload the firmware to your Rodeostat. To do this click on the Upload button in the upper left corner of the Arduino IDE window.
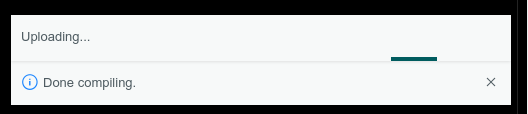
It will take several seconds for the firmware to upload to the Teensy 3.2 on the Rodeostat. While the firmware is uploading you will see and Uploading popup in the lower right hand corner of the IDE window.
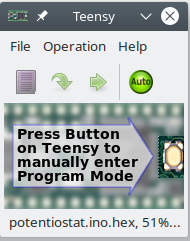
You will see a small window for the Teensy Loader application appear which is the program which uploads the firmware from your computer to the Teensy over USB. You shouldn't need to do anything with the Teensy Loader. An image of the Teensy Loader is shown below.
When the firmware is done uploading you will briefly see the popup in the lower right hand corner displaying the text Done uploading before disappearing.

At this point, if there are no errors, the firmware on your Rodeostat should be uploaded and your device should be ready to use!
Similar to when building the firmware, if an error does occur, error messages are shown in the Output window in orange/red text and an Upload error popup window will be shown.
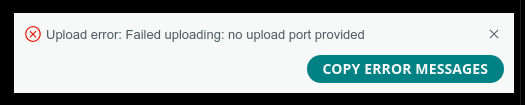
The window contains the button allowing you to copy any error messages to the clip board.
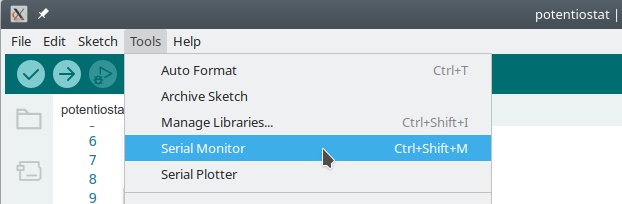
Step 5. Verifying the firmware upload. Once you have completed uploading the firmware to your Rodeostat you may want to perform a quick check to verify that the firmware is running correctly. This can be done from Arduino IDE by sending a JSON command to the Rodeostat.
To do this open the Serial Monitor which can be found under the Tools menu.
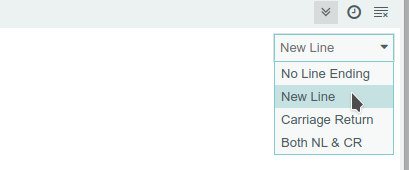
When the Serial Monitor is open a message entry textbox will appear in the lower part of the IDE window as shown below.

An option for selecting the type of line ending will appear to the right of the textbox. Make sure it is set to the option New Line.
To verify that the firmware is running correctly we can send a JSON command to the Rodeostat to have it send us the version number of the firmware running on the device. To do this, enter the text shown below into the Serial Monitor's message entry textbox.
{"command": "getVersion"}Press enter to send the command to the device. Make sure the textbox has focus when you press enter - it should look like that shown below.

If the firmware is working correctly, you should get a response back from the device telling you the firmware version number which is similar to that shown below.

Your Rodeostat should now running the latest firmware and ready to use!