Chronoamperometry with glucose test strips
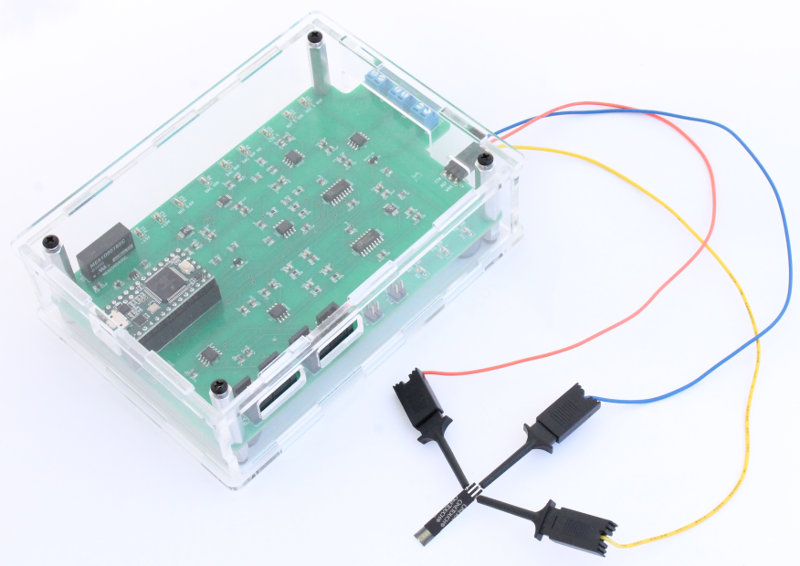
In this electrochemistry experiment we used the Rodeostat potentiostat to measure glucose in liquids using commonly available glucose test strips. Glucose test strips are a type of biosensor - they convert biochemical reactions to an electrochemical signal. Each glucose test strip contains the enzyme glucose oxidase (GOx) and an electron transfer mediator. On the surface of the test strip, glucose oxidase converts glucose to gluconic acid and hydrogen peroxide, transferring two electrons to the flavin (FAD) group in glucose oxidase which is temporarily reduced (FADH2). Enzymes do not readily exchange electrons directly with an electrode, so a mediator is required to shuttle electrons from FADH2 to the electrode surface in the strip. Glucose test strips, which are second-generation biosensors, commonly use the well-known mediator ferricyanide in this process. Ferricyanide is capable of rapidly transferring electrons with an electrode. It also has a relatively low oxidation potential.
Chronoamperometry
Chronoamperometry is a very useful potential-step voltammetry method. An applied electrode potential (via the potentiostat) at the electrode surface forces the electron mediator (ferricyanide) reaching the electrode surface to immediately undergo an electron transfer reaction. The reduced form of the mediator is reoxidized and the measured current signal is proportional to the glucose concentration.
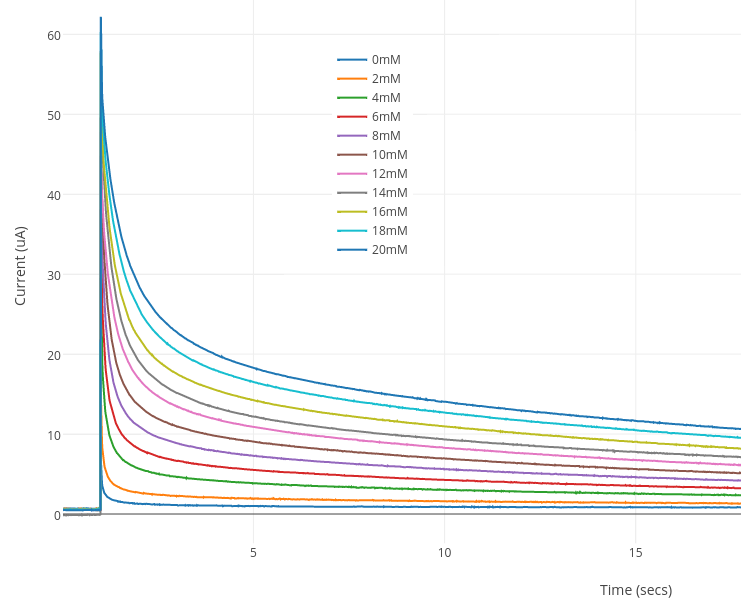
Below is a example of a time vs. current graph from the potential-step method. After a 1 sec resting period, the potential is stepped to a set voltage and held constant for a period of time. An initial spike in current is observed. The current after this initial peak is limited by diffusion. Because the reactant is being converted at the electrode surface, its average concentration will decrease in the vicinity of the electrode and the current will decay with a t-1/2 relationship. This is explained further on this page (link).
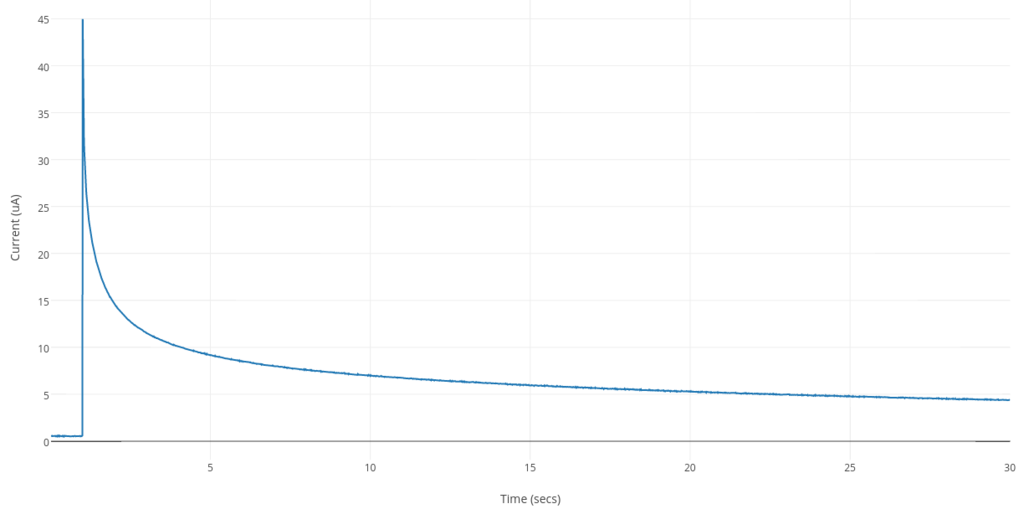
Current (rate of electron transfer) at a given time is directly proportional to concentration as shown by the Cottrell Equation. This is outside the scope of this blog post but you can read more about Chronoamperometry, the Cottrell Equation as well as more about glucose sensors in this link. Another source of further background reading is this article.
Equipment and materials
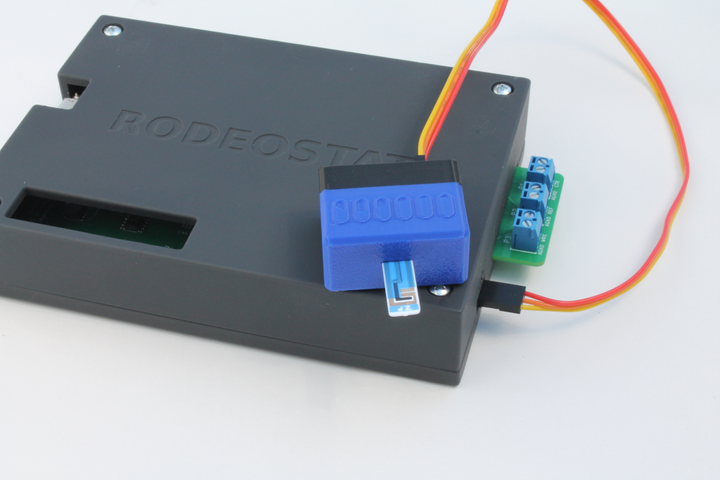
In addition to the Rodeostat open source potentiostat, we also used the following equipment and reagents.
1) Glucose
D-(+)-Glucose was purchased from Sigma chemicals, Part # G8270-100G. Approx. $22 for 100 g of glucose. A 100 mM D-glucose solution was prepared a day ahead to allow for mutarotation equilibration between the α and β forms.
2) Glucose test strips
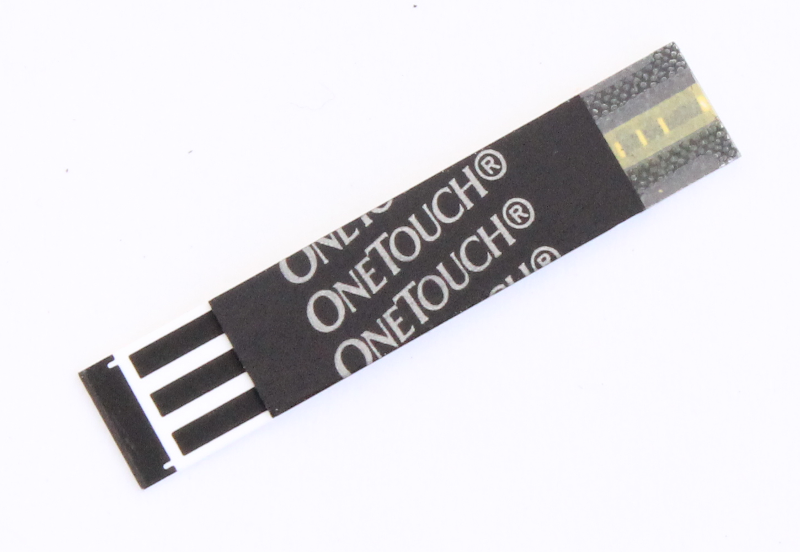
In this experiment we used OneTouch Ultra® test strips. These can be purchased from Amazon for approx. $27 for a pack of 50 strips.
3) Electrode connector leads
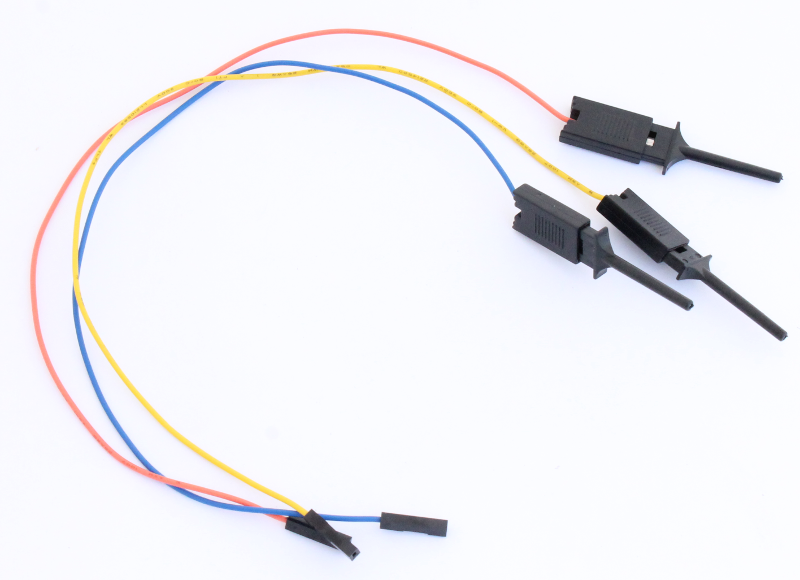
The pads on the strips are very small so to connect the strip to the Rodeostat we used test clips with a mini-grabber on one end. These test leads came with our Bitscope Mini oscilloscope but they can be bought separately from Bitscope (Part # CLP-02). These test leads have a female connector on the opposite end which connect to the 3-pin header on the Rodeostat.
Equipment Set-Up
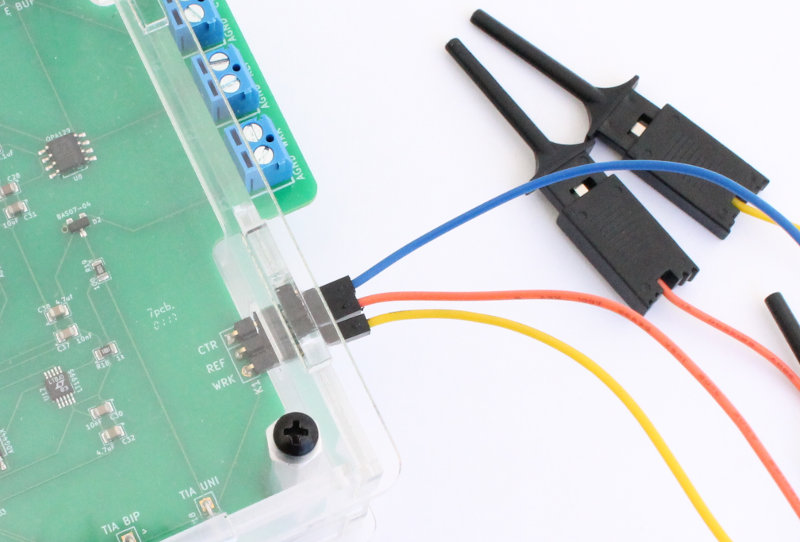
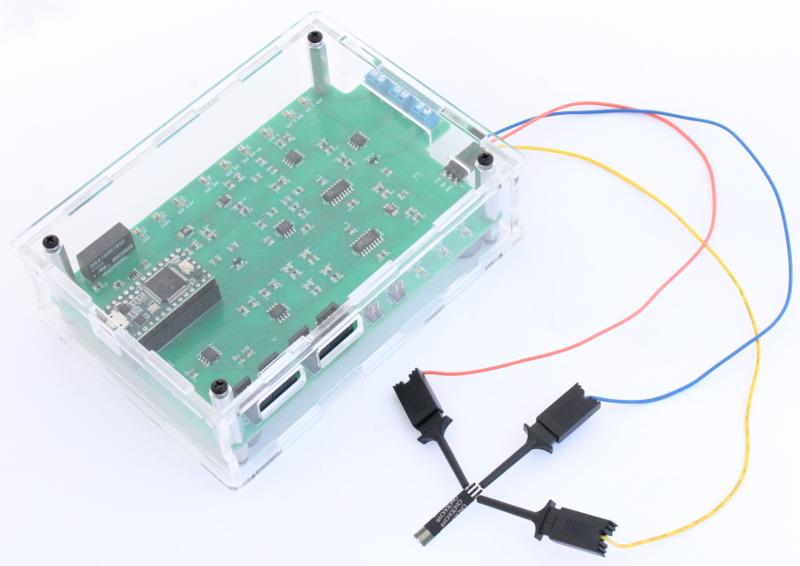
Connect the three cables to the 3-pin header on the Rodeostat as shown in this image. Next to each pin on the PCB there is a reference to the electrode. In this example the cables are connected as follows: Counter Electrode (CTR) - blue wire, Reference Electrode (REF) - red wire and Working Electrode (WRK) - yellow wire.
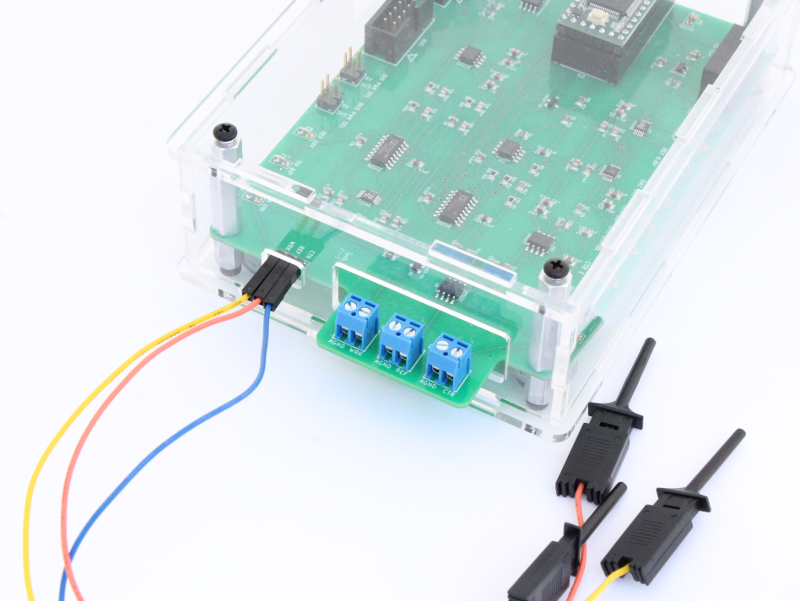
Here is a different view of the cables connected to the Rodeostat.
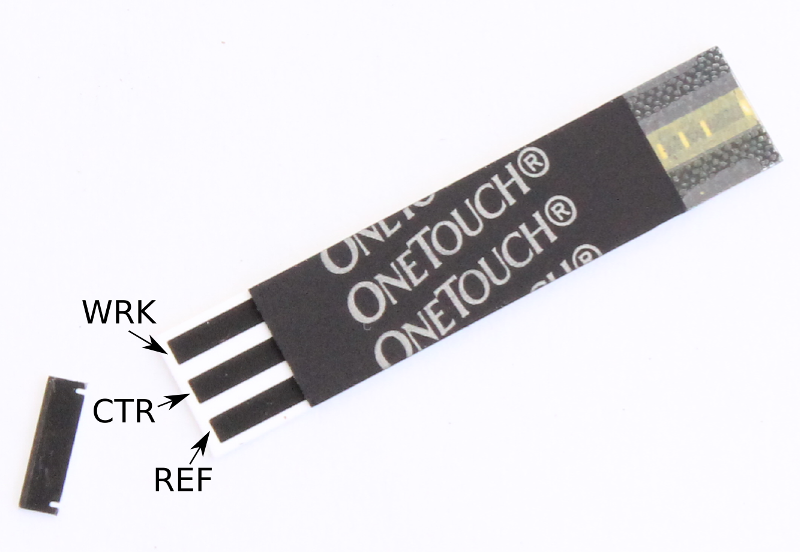
Using a pair of scissors cut off the strip on the edge of the OneTouch glucose strip.
Connect the ends of the cables to the strip as shown. Make sure that the correct connections are made. So, in this case, the red reference electrode cable is connected to the reference electrode pad, the blue counter electrode cable is connected to the counter electrode pad and the yellow working electrode cable is connected to the working electrode pad.
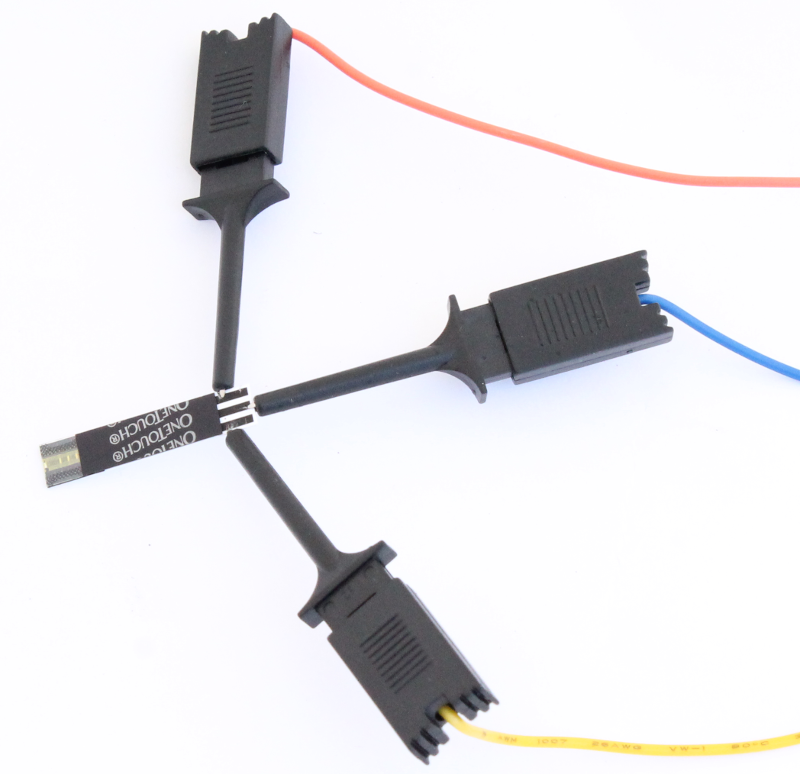
Image of final equipment set-up
Rodeostat chronoamperometry program
The chronoamperometry test we used is pretty straightforward, consisting of two parts:
- a quiet period where the potential was held at 0 mV for 1 secs,
- a test period where the potential was stepped to 500 mV and held constant for 29 secs.
A copy of the python program used to implement this test can be downloaded from here.
Making a glucose calibration curve
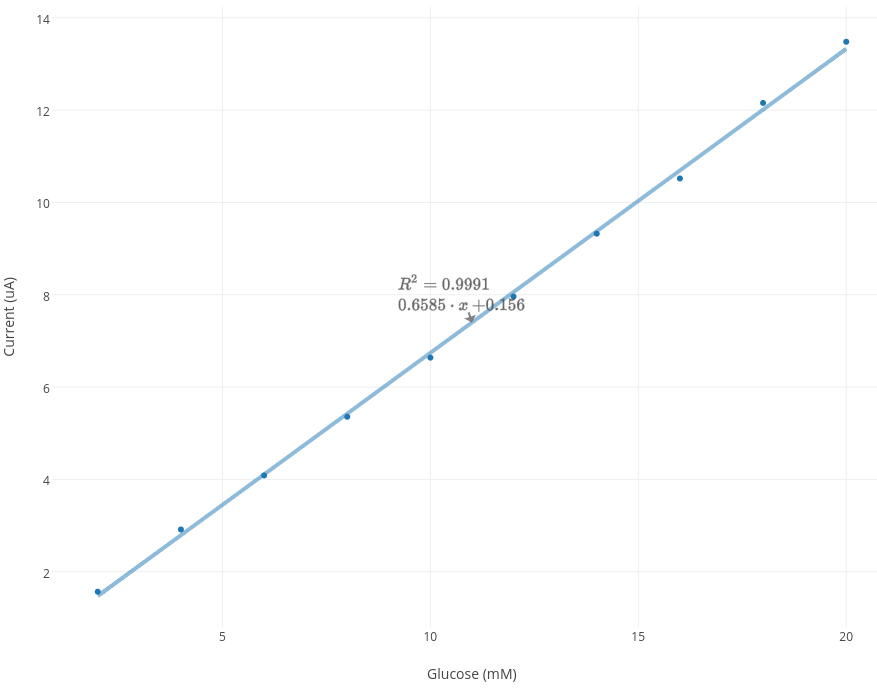
The day before the experiment, a 100 mM solution of glucose was prepared in distilled water (1.80 g in 100 mL). In preliminary testing we had determined that a concentration vs. current slope is linear with these test strips between 2-20 mM glucose. A series of dilutions in this range was prepared from the 100 mM stock.
A small drop of sample was applied to the strip - you can easily observe the drop getting pulled into the strip. The Rodeostat chronoamperometry experiment was started immediately after the sample is added. Each sample was measured using a new glucose test strip. Below is the resulting chronoamperometric plots.
The current (µA) at 10 secs was recorded and plotted for each sample in the graph below. The slope and intercept was also determined.
Measuring glucose in beverages
We are able to use the glucose calibration curve prepared above to measure the amount of glucose in sugary drinks. The amount of glucose in popular drinks Coke, Sprite and Red Bull has been measured by HPLC in a previous study (download) so we used these as our reference glucose values. We also included a Mango juice with unknown glucose concentration. Each sample was diluted 20-fold in distilled water and measured on a new glucose test strip.
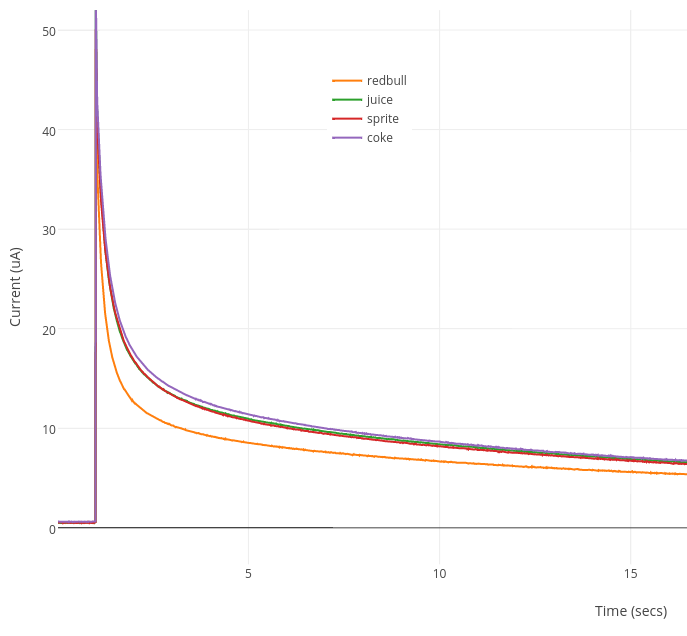
The µA current @ 10 secs was recorded for each sample. Using the glucose standard curve, the mM concentration of glucose in each sample was calculated. This was converted to g/L (1 mM = 0.18 g/L glucose). After factoring in the 20-fold dilution, the final glucose concentration was determined.

As can be seen from the Table, Coke had the highest measured glucose concentration (44.17 g/L) and Red Bull had the lowest (34.31 g/L). The Red Bull glucose concentration was the closest to its reference value. Both Coke and Sprite glucose concentrations were slightly higher than expected. The measured glucose concentration in Mango Juice (43.34 g/L) was most similar to the glucose concentration in Coke.
Note that this experiment only measures the glucose component of the sugars in the samples, and does not measure fructose or total sugar.
Summary
Measuring glucose concentrations in liquids with the Rodeostat and glucose test strips was very easy and could be a useful teaching method for teaching electrochemistry, potential-step voltammetry and biosensors. Most of the reagents are affordable and the experiments are very reproducible, quick and easy to carry out.

Comments ()