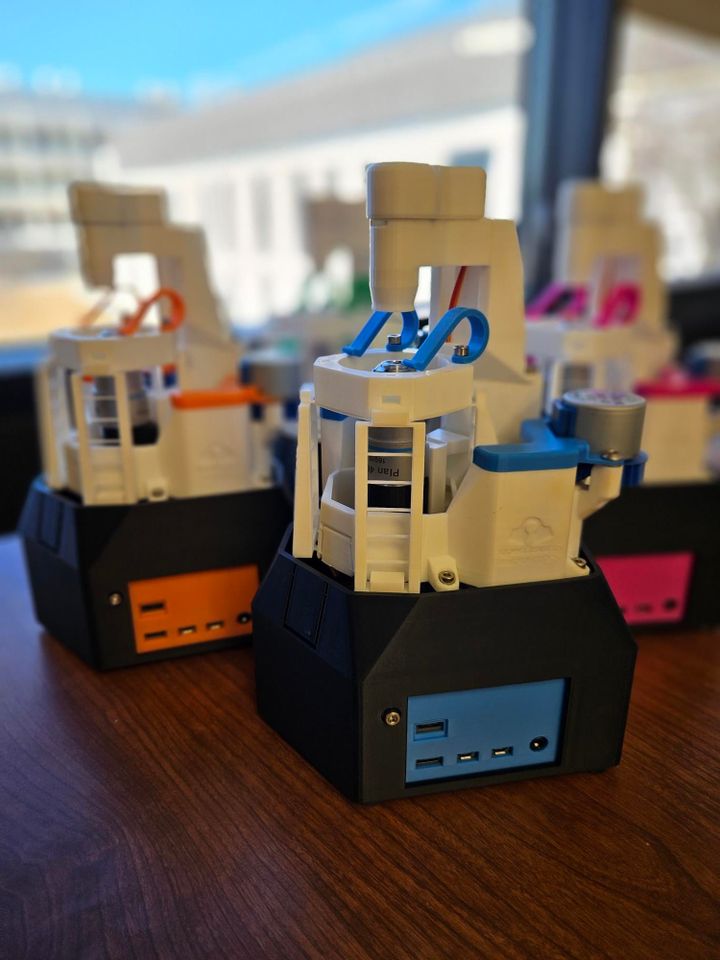
New tools for creating a custom calibration for the Open Colorimeter
New documentation for creating custom calibrations for the Open Colorimeter.
This week we have been finishing our main Open Colorimeter documentation pages. We will be adding more to the documentation in the future, though maybe not as frequently as this last month! This week we added documentation for creating custom calibrations.
 William Dickson
Currently the Open Colorimeter firmware includes 4 default methods. For example, if you want try measuring the amount of blue food dye 1 in a beverage, you can simply put some into one of the provided cuvettes and use the default method called "FD&C Blue 1". This will return the amount of blue food dye in your sample in mg/L.
We anticipate that users will want to modify this menu. For example, to add a frequently used method or remove default files you don't plan to use. In this newsletter we will focus on a new tutorial and tools we have developed for adding a new method to your open colorimeter.
Selecting a colorimetric assay and collecting calibration data
The first step for adding a new method is to select a colorimetric assay. If you already know what assay you will use (e.g. Bradford's assay for measuring protein) then you are all set. If not, then you can start to do some research around commonly used colorimetric methods for the analyte you want to measure. Knowing what range you want to be detecting will also help narrow down which colorimetric assay to use. Assays are designed to measure within a specific range, so it's good to know whether you want to be in the 'low' versus 'high range'. Some assays may require additional equipment, or incubation steps. Looking for a simple assay is usually a good idea! The optimal LED wavelength to use is also determined by the colorimetric assay you are using. It's usually best to know where your peak absorbance will be so you can be sure you will have that wavelength available. For examples of experimentally determining the peak absorbance, check out our tutorials for nitrite, nitrate or ammonia. You can also search the literature as most commonly used colorimetric assays will report the optimal wavelength to use. We will write more about selecting colorimetric assays in another newsletter.
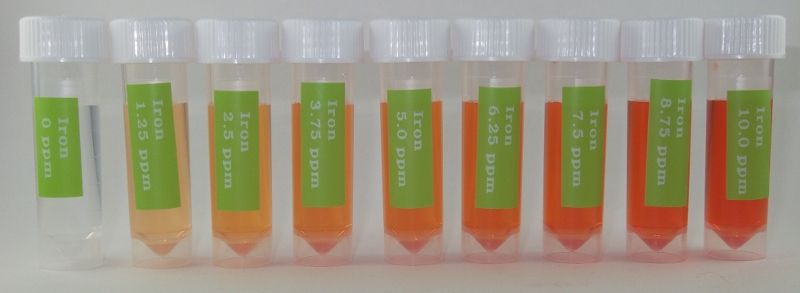
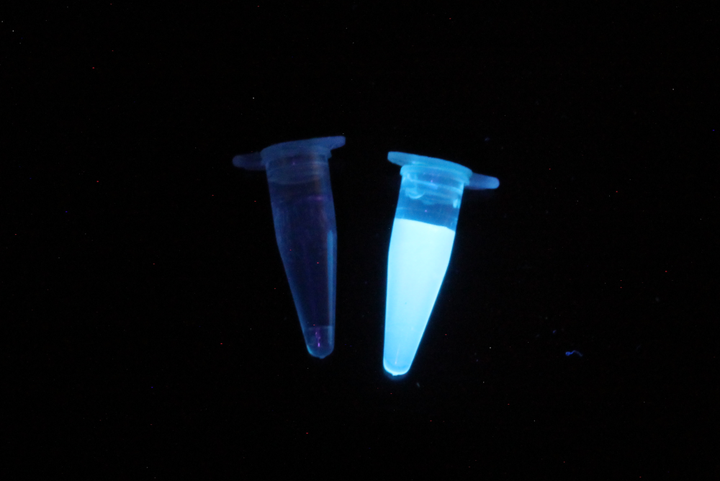
Once you have your colorimetric assay ready, the next step is to collect absorbance data for samples with known concentrations of your analyte of interest. For example, when adding a new colorimetric test for iron, we would use an iron standard (e.g. Iron standard, 200 ppm) to prepare a range of standard solutions. In the image below, we used the FerroVer® Iron Reagent Powder Pillows. This uses the 1,10 phenanthroline colorimetric method for measuring iron. The powder reagents are added to the test solution in a capped tube and shaken. Using the Open Colorimeter and an appropriate LED wavelength board (in this case we used a 470nm LED) absorbance data is generated for a range of 0-10ppm iron.
Once you have this absorbance data, the next step is to create a .toml calibration file with the following format:
name = "Iron Hach"
led = 470
units = "ppm"
fit_type = "polynomial"
fit_order = 2
values = [
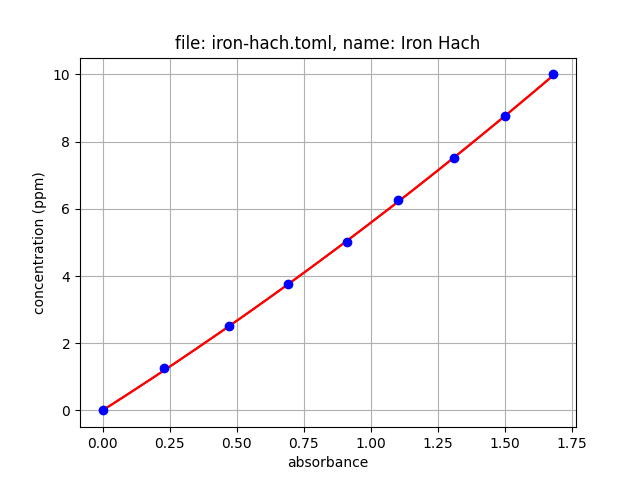
[0.00, 1.25, 2.5, 3.75, 5.0, 6.25, 7.5, 8.75, 10.0], # concentration
[0.00, 0.23, 0.47, 0.69, 0.91, 1.10, 1.31, 1.50, 1.68] # absorbance
]New tools for creating a calibration .json file
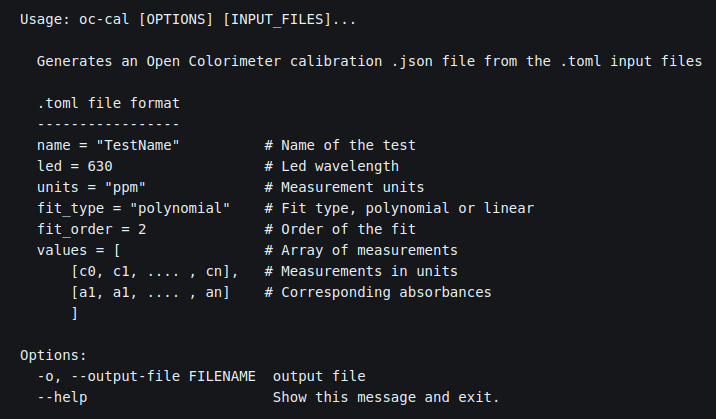
The final step is to generate the calibration .json file for the Open Colorimeter. We have created a tool called oc-cal which is part of the open-colorimeter-utils package. Instructions for installing the open-colorimeter-utils package is described in this newly added documentation page:
William DicksonFollow the instructions in this tutorial to create your custom .json file. For example, after running the iron .toml file through oc-cal, we get the following .json file. The tools also returns a plot that can be saved.
{
  "Iron Hach": {
    "units": "ppm",
    "led": "470",
    "fit_type": "polynomial",
    "fit_coef": [
      0.5128836532746158,
      5.0761744208837625,
      0.0
    ],
    "range": {
      "min": 0.0,
      "max": 1.68
    }
  }
}
Add this new .json data to your colorimeter by simply editing the calibration.json file on the Open Colorimeter. Your new test will show up in the Open Colorimeter menu ready to be used! Instructions on upgrading the firmware is described in the Documentation here:
William Dickson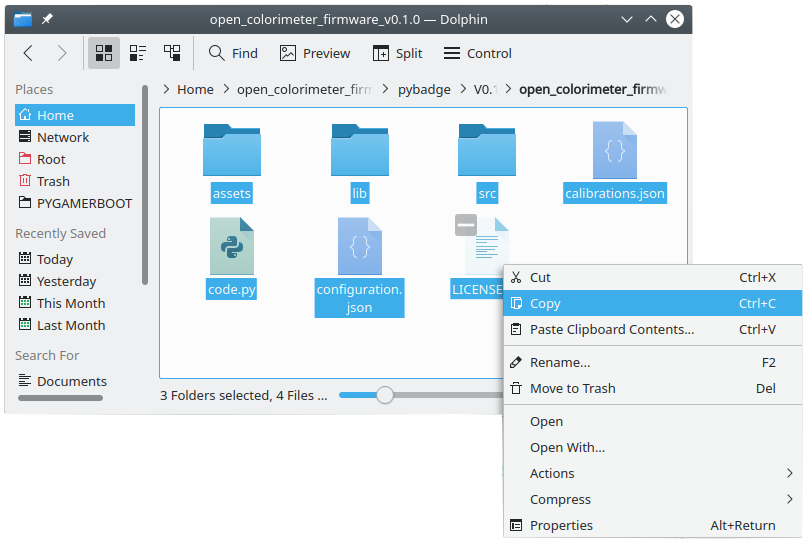
Comments ()