Getting Started: Basic Operation & Menu Navigation
These instructions below apply to all variants of the Open Colorimeter.
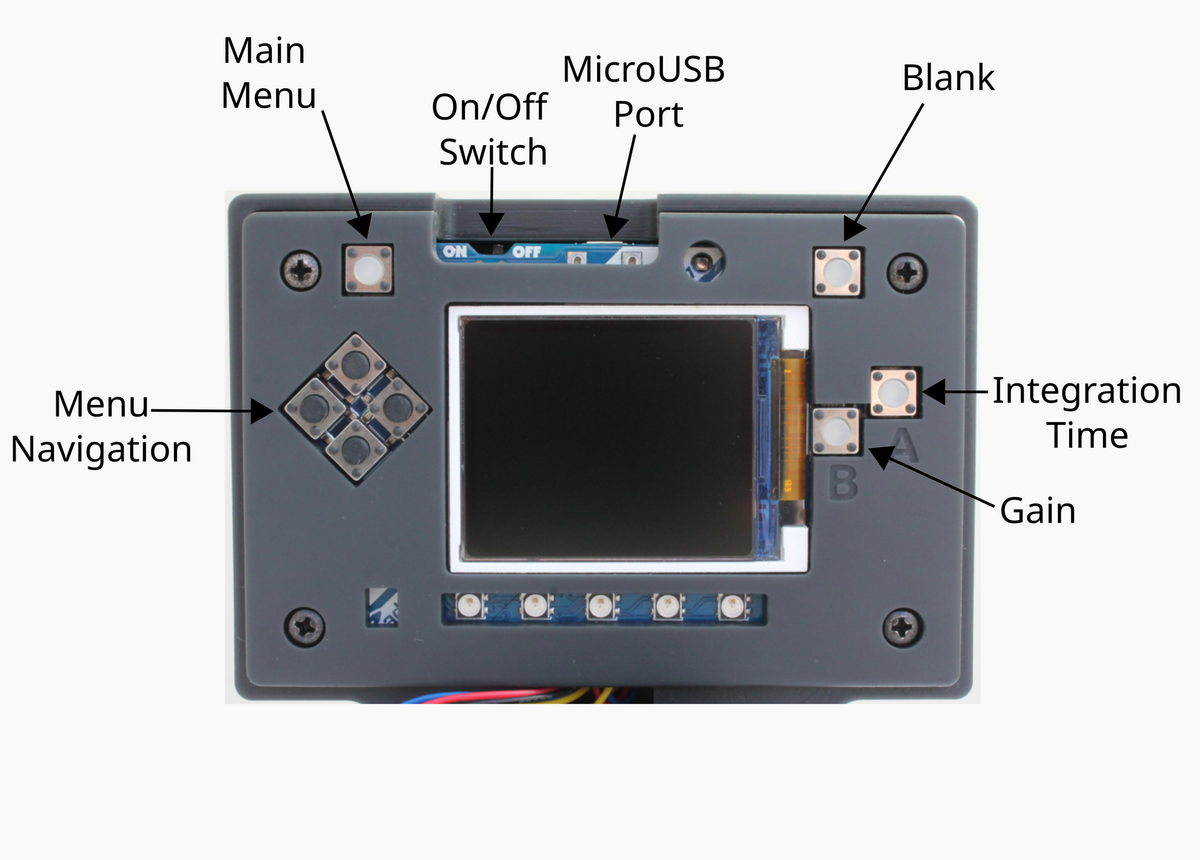
The Open Colorimeter has the following features:
- On/Off switch: An on-off switch will save battery power when not in use
- Micro USB Port: You can power from the Micro USB port and it will also charge up the battery
- Blank button: Use this with a blank reference (no signal) to set the measurement background before sample measurements. A cuvette with distilled water is commonly used as the blank reference
- Menu button: Use this to switch to the menu screen
- Menu navigation cluster: Use these buttons to navigate ⇧⇩⇨ through the Menu
- Gain and Integration time: Sets the gain and integration time of the internal amplifiers for the photodiode channels allowing the user to control the sensitivity of the device. These are only active in the "Raw Sensor" measurement screen.
Instructions and Menu Navigation
You can set into a few different mode. Absorbance, Transmittance or a concentration. Use the menu navigations to select the mode of choice. Make sure you're using the correct LED. If not read instructions to switch it out below
- Switch on the colorimeter
- The intro splashscreen appears followed by the default absorbance screen
- Press the Top Left button to enter the Menu
- Use the cluster of 4 buttons on the lefthandside to navigate ⇧⇩ the menu
- To select a Mode (e.g. Transmission) press the right ⇨ button in the cluster
- Press the Top Left button to go back to the Menu at anytime
0:00
/0:48
Blanking the colorimeter
Before taking a measurement, you need to blank (aka 'zero' or 'calibrate') the colorimeter. This sets the measurement background against which your sample is compared. A cuvette with distilled water is commonly used as the blank reference. It should be a sample with no 'signal' present
- Switch on the colorimeter and place the blank sample in the cuvetter holder. Place the black light-blocking cover over the cuvette holder
- Press the Top Right Blank button. You should see a flashing "Blanking" line on the screen
- Once the blanking has finished, put your sample in and record the absorbance, transmittance or concentration value, whichever mode you are using
0:00
/0:47
Changing LED Boards
0:00
/1:13

Open Colorimeter Product Guide
Documentation site for the Open Colorimeter, Multi-Channel Colorimeter, UV Open Colorimeter & Open Colorimeter Plus
Product Guide Home Page