Making a custom electrochemical cell
In this blog post we describe making a simple custom electrode mount that we used in cyclic voltammetry experiments with the Rodeostat potentiostat. The electrodes we used were purchased from CH Instruments but the custom mount could be easily modified for use with other electrodes.
In this blog post we describe making a simple custom electrode mount that we used in cyclic voltammetry experiments with the Rodeostat potentiostat. The electrodes we used were purchased from CH Instruments but the custom mount could be easily modified for use with other electrodes.
Designing a custom electrode mount for the electrodes
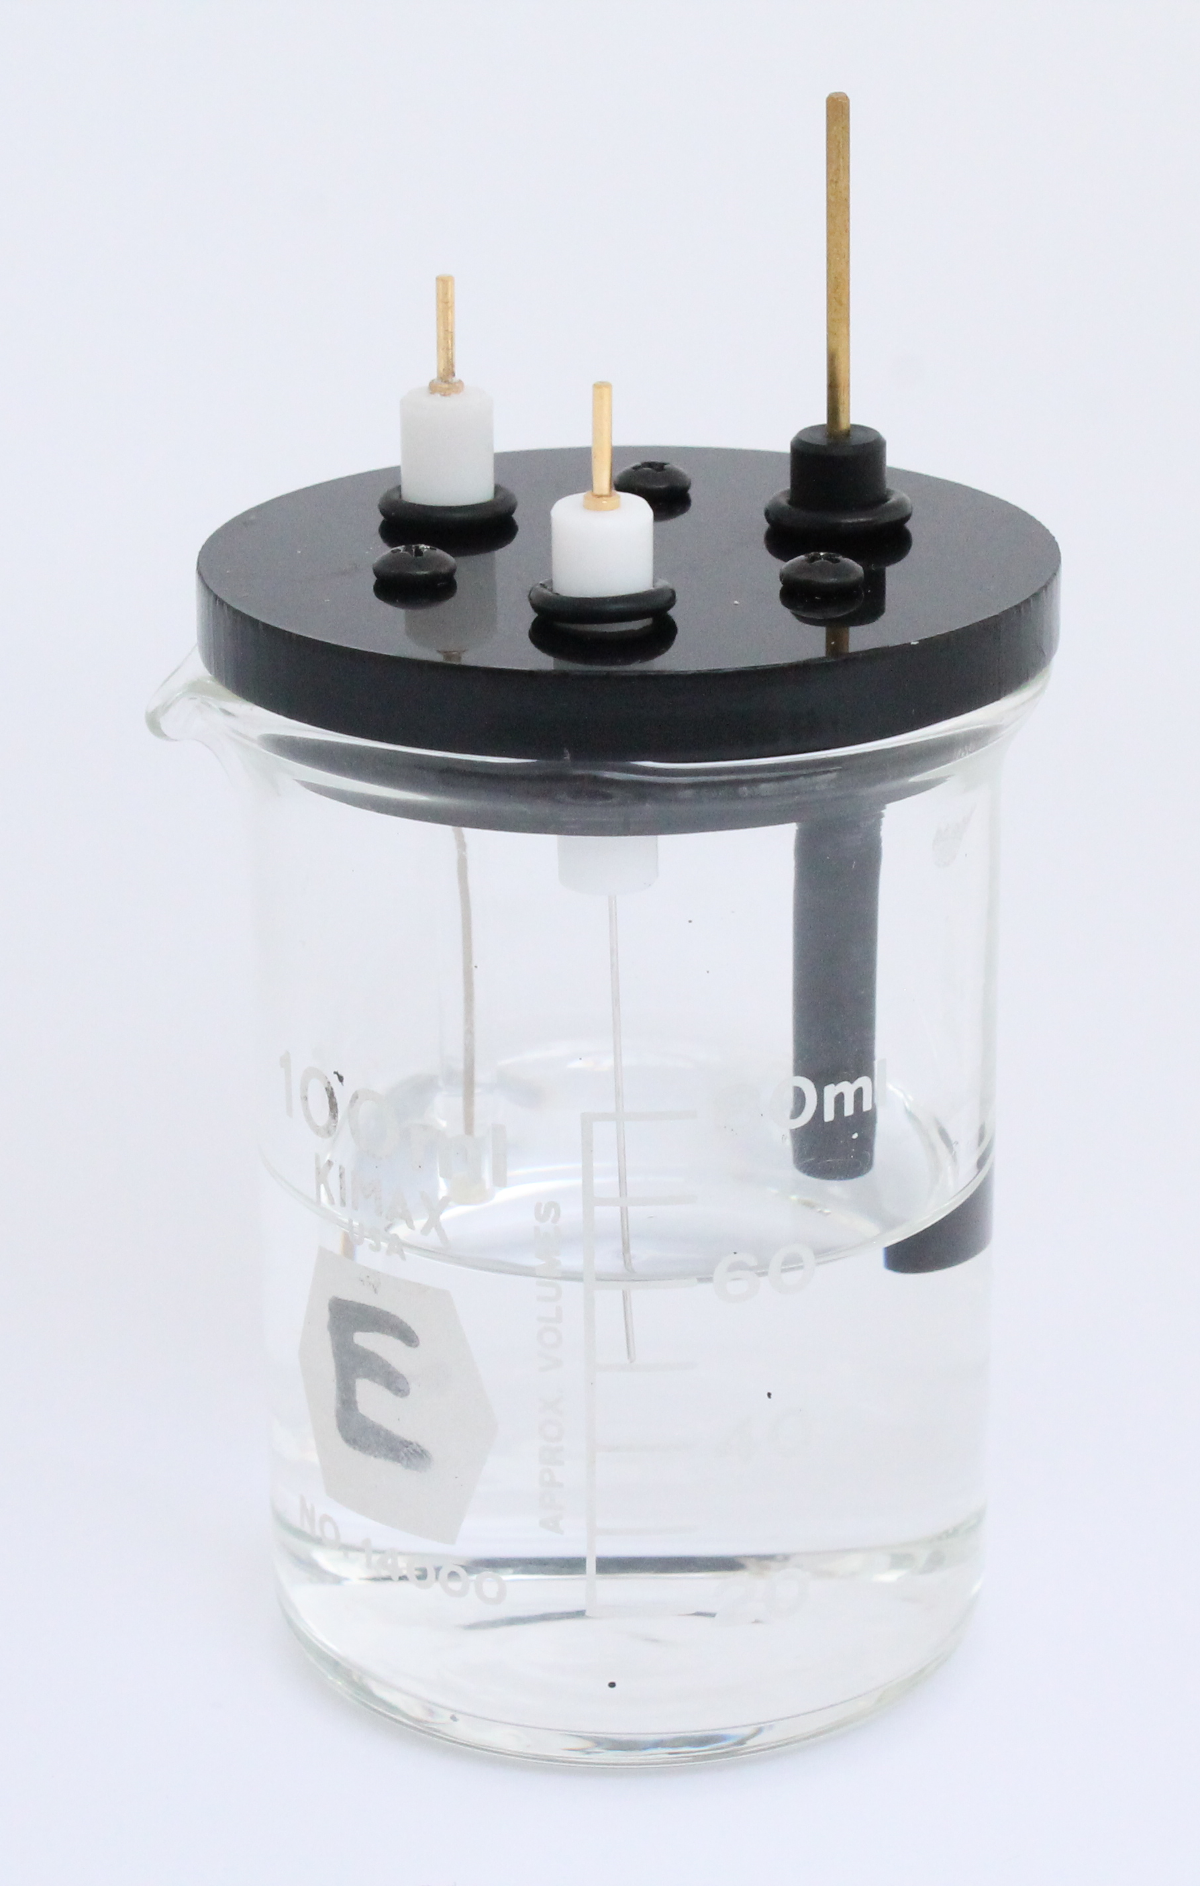
For the set-up we decided to use a standard 100 mL glass beaker that we had available. The 100 mL beaker has an inner diameter of approx. 1.90". The next step was to make a custom mount for the 3 electrodes.
- Ag/AgCl2 reference electrode, Part # CHI111, $26
- Platinum wire counter electrode, Part # CHI115, $79
- 2 mm diameter platinum working electrode, Part # CHI102, $89
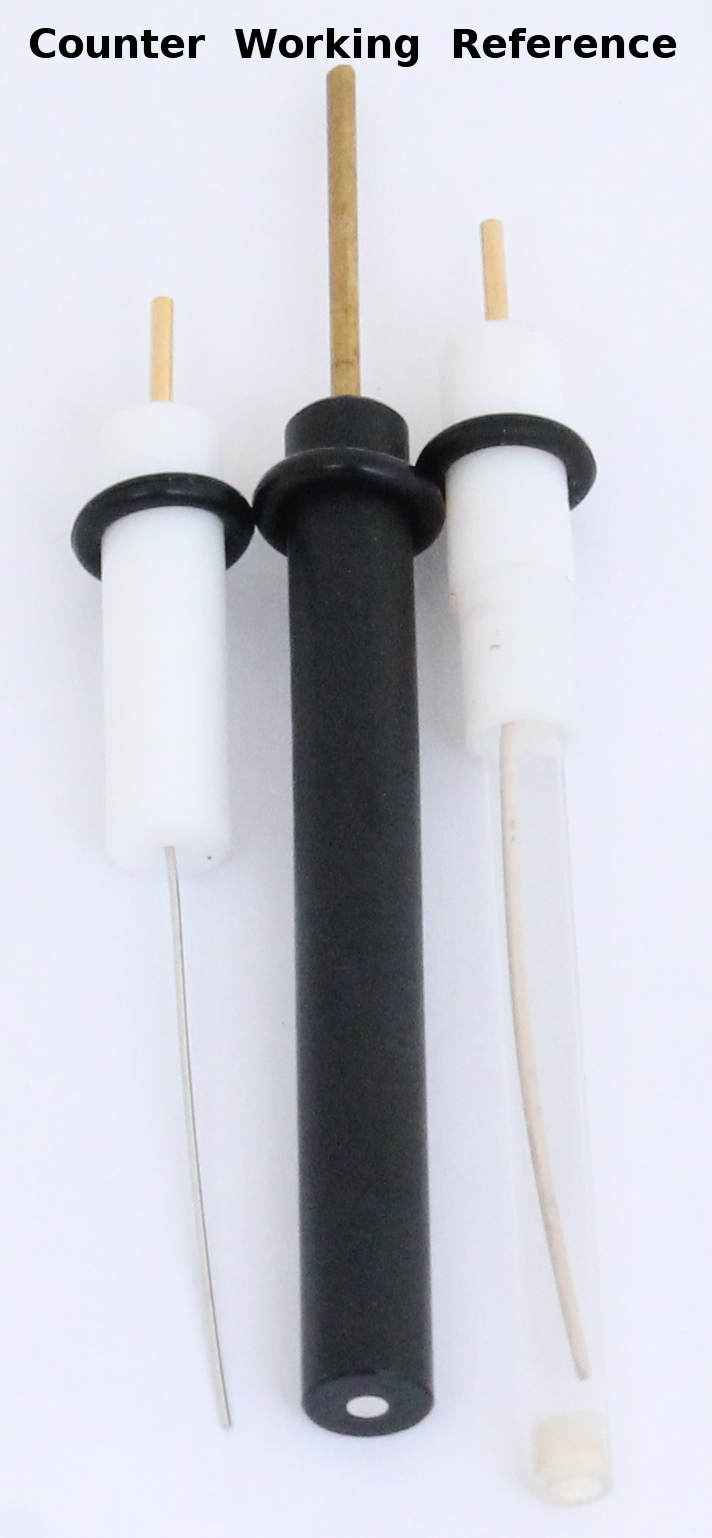
The insulated part of the electrodes that we want to mount (where the O-ring is mounted in the image above) has an outer diameter of approx. 6.2 mm (reference and counter) or 6.4 mm (working).
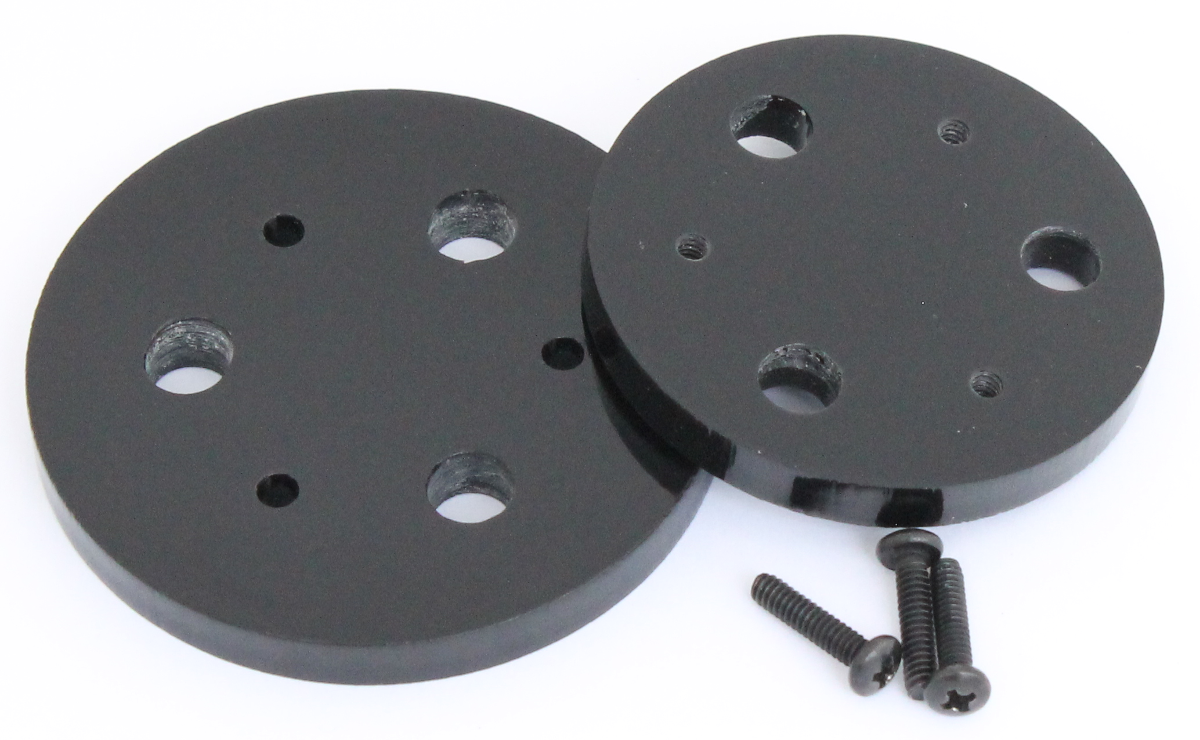
We designed the electrode mount to have to following features:
Two individual parts: a large 2.25" disk and a smaller 1.88" disk
Laser cut from 1/4" black acrylic
Both parts have three 0.255" (6.5 mm) electrode holes
The large disk has three 4-40 through holes
The smaller disk has three 4-40 tap holes
After lasercutting, the screw holes in the smaller disk were tapped with a 4-40 hand tap and the two parts assembled together using three 4-40 screws.
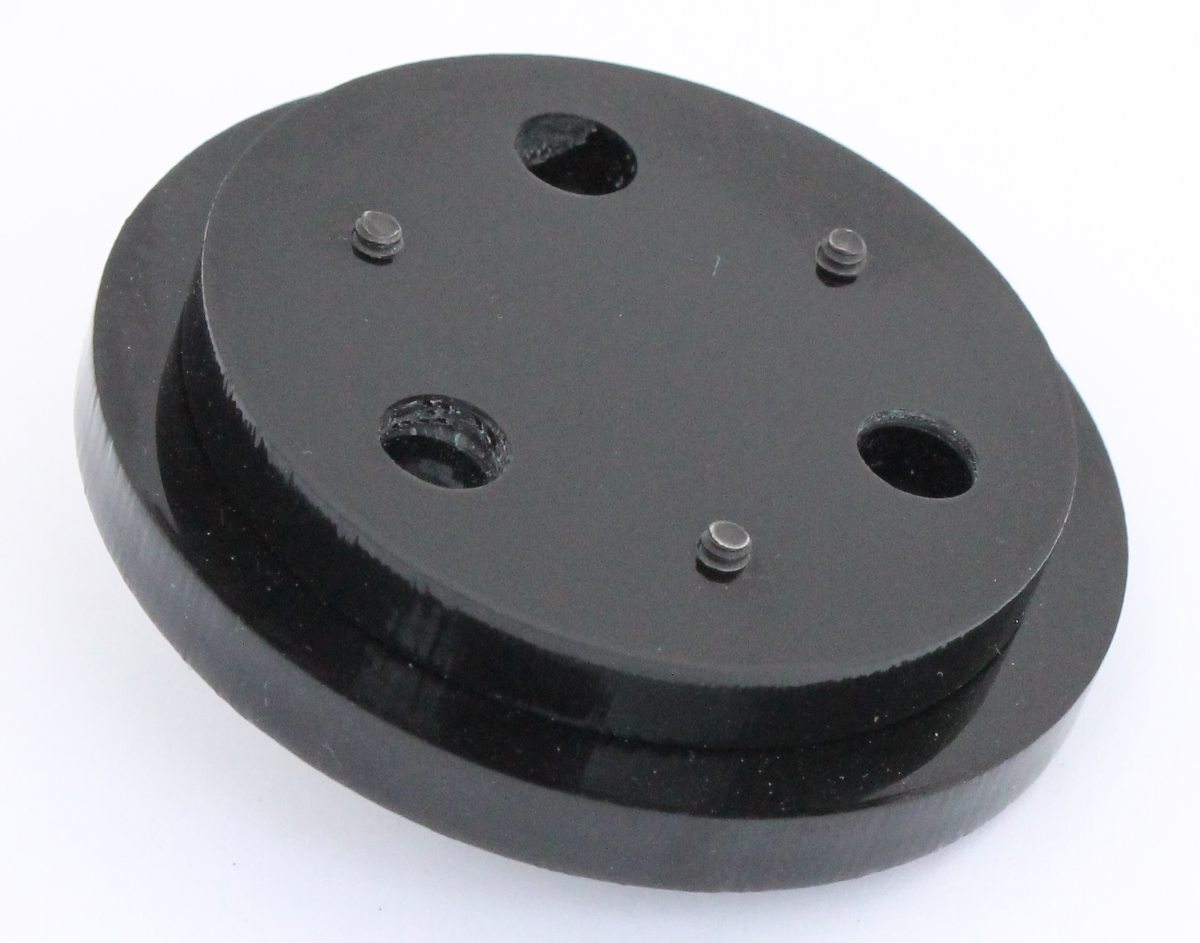
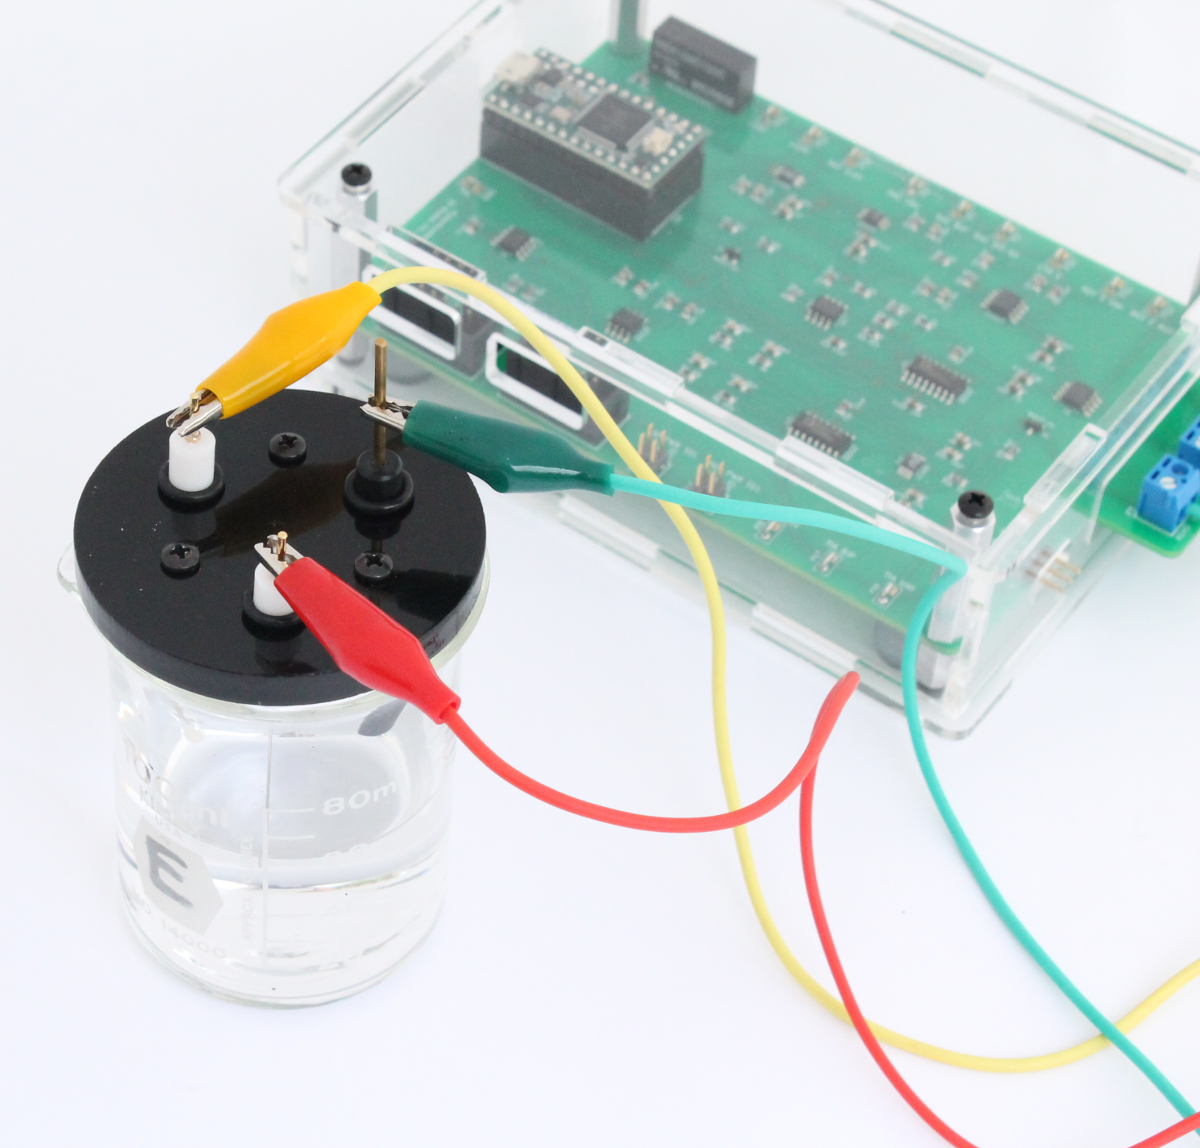
Once assembled the electrode mount fits into the 100 mL beaker as shown in the images below. For this setup, approximately 50 mL of test solution is needed for the experiments. However, it should be very easy to make an electrochemical cell for testing smaller volumes using a 25 or 50 mL beaker and custom electrode mount.
Connecting to the Rodeostat
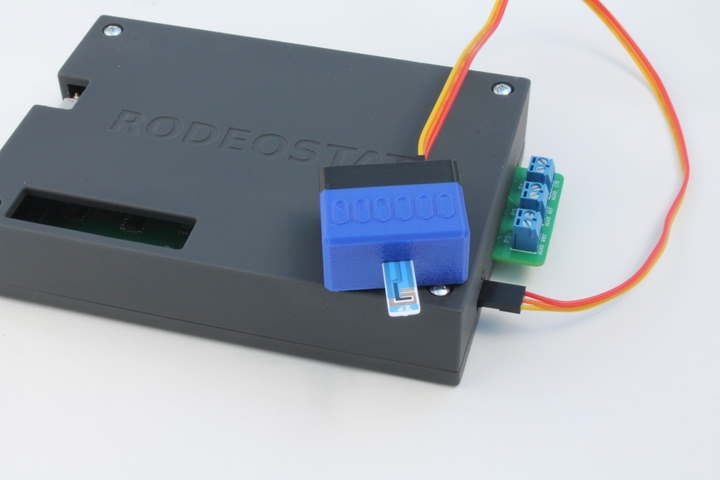
The electrochemical cell is connected to the Rodeostat using the 3 alligator cables that are included with the Rodeostat. The cables are first connected to the screw-terminal headers on the board. In the image below the yellow cable is the reference, red is the counter and green is the working.

Next, the alligator clips are attached to the corresponding electrode.

Cyclic voltammetry experiments
Using the electrochemical cell, we performed two cyclic voltammetry experiments:
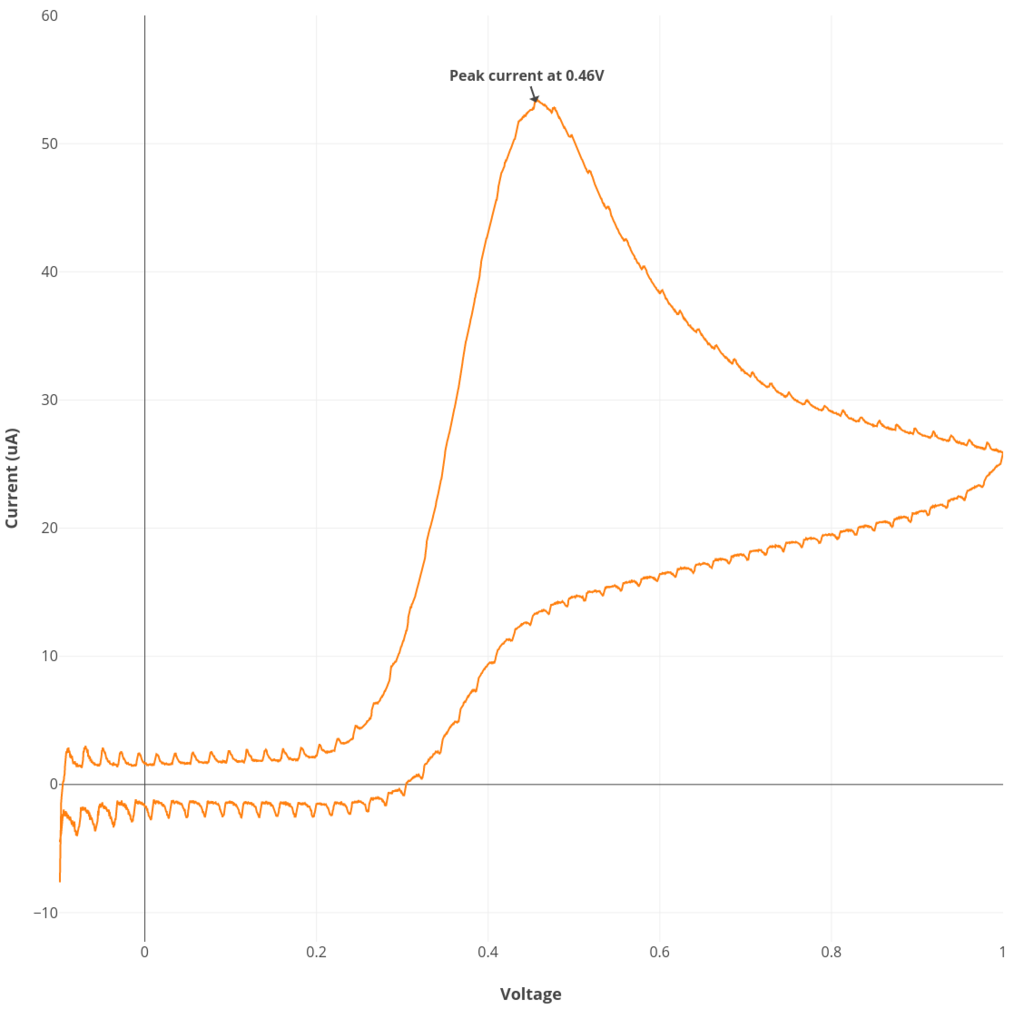
6 mM ascorbate in 0.1M KCl as an example of an irreversible reaction
10 mM ruthenium hexamine in 0.1M KCl as an example of a reversible reaction
Experiment #1: Ascorbate cyclic voltammetry
See the procedure described here for Rodeostat CV parameters and making the 6 mM ascorbate solution. Note that this experiment requires 50 mL of solution.
Experiment #2: Reversible cyclic voltammetry
See the procedure described here for Rodeostat CV parameters and making the ruthenium hexamine solution. Note that this experiment requires 50 mL of solution.

Comments ()