Optimizing the light sensor settings

The Open Colorimeter uses a TSL2591 light sensor, as described in the electronics page. In these notes we describe the light sensor settings and how to adjust them in order to achieve the best results.
 Joanne Long
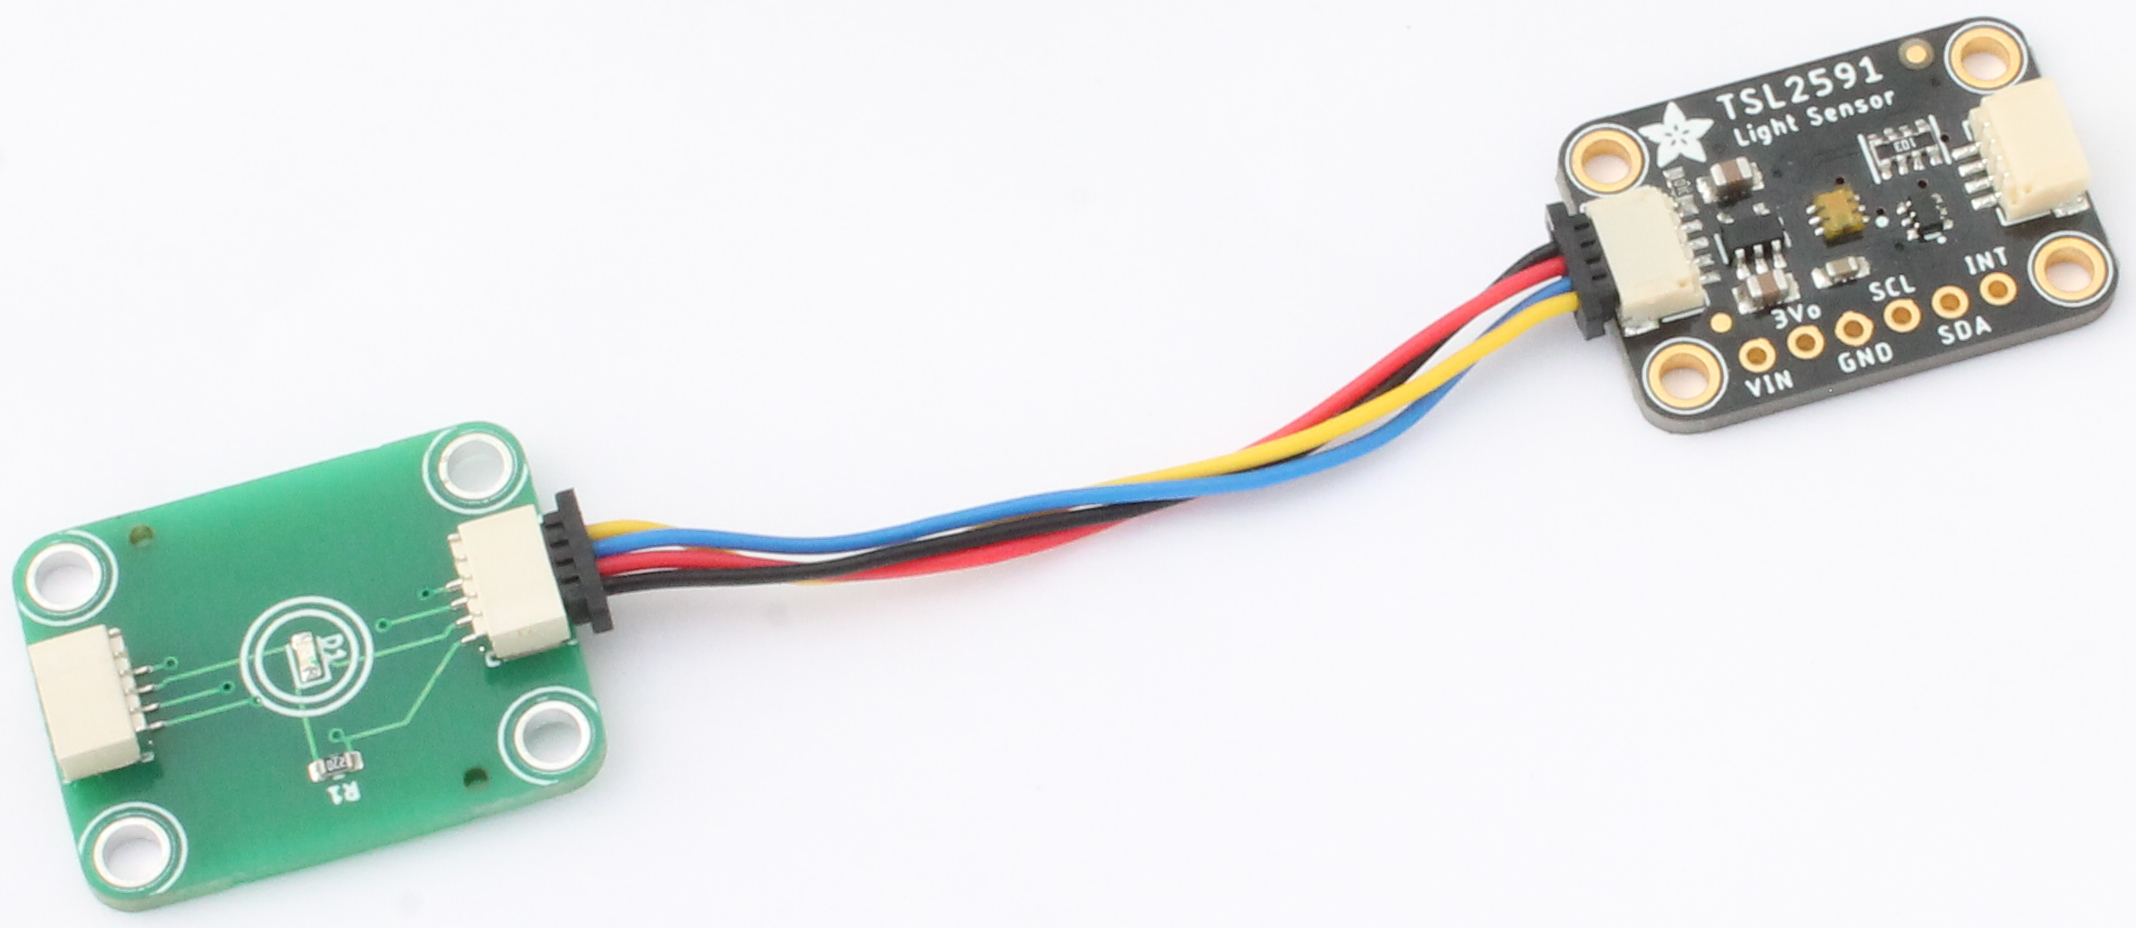
The light sensor returns a digital result (an integer count) which is proportional to the intensity of the light incident on the sensor. This count is a 16-bit integer and can only take on a finite range of possible values. In order to achieve the highest resolution it is advantageous to use as much of this range as is possible.
The sensor has two settings, a gain and an integration time, which can be adjusted to make the best use of this range of values. To get the best measurements with your Open Colorimeter, we recommend adjusting the gain and integration time settings for the TSL2591 light sensor to values which are appropriate for the LED that you are using.
Gain Setting
The gain of the sensor sets the internal gain used by the photodiode amplifiers. It has four possible values:
The gain is a multiplier for the count values returned by the sensor. For example, a gain=med (25x) setting will return count values which are approximately 25 times higher than a gain=low (1x) setting.
Integration Time Setting
The integration time of the sensor sets the duration for which the photodiode is exposed to light (integrating) for each measurement. It has six possible values:
The count values returned by the sensor are proportional to the integration time, e.g. an integration time of 200 ms will return count values which are 2x larger than an integration time of 100 ms. Similar to the gain setting the integration time acts like a multiplier for the count values returned by the sensor with multiplication values ranging from 1x to 6x.
Coarse vs Fine Adjustment
When viewed as multipliers for the count values returned by the sensor the multiplication values for integration time setting (1-6) are smaller than those for the gain setting (1-9876). Thus the integration time setting can be thought of as a fine adjustment and the gain setting as coarse adjustment for the light sensor count values.
Adjusting the light sensor settings
The Open Colorimeter ships with the following default light sensor settings:
You do not have to adjust these, you can use the Open Colorimeter with these default settings. However, we do recommend familiarizing yourself with these settings and adjusting as necessary.
Steps to adjust gain and integration time
Check out the Getting Started guide if you haven't already!
- Press the Top Left button to enter the Menu
- Use the cluster of 4 buttons immediately below the Menu button to navigate
- Use the ⇩ button to highlight the "Raw Sensor" option
- Select the "Raw Sensor" mode by pressing the right ⇨ button in the cluster

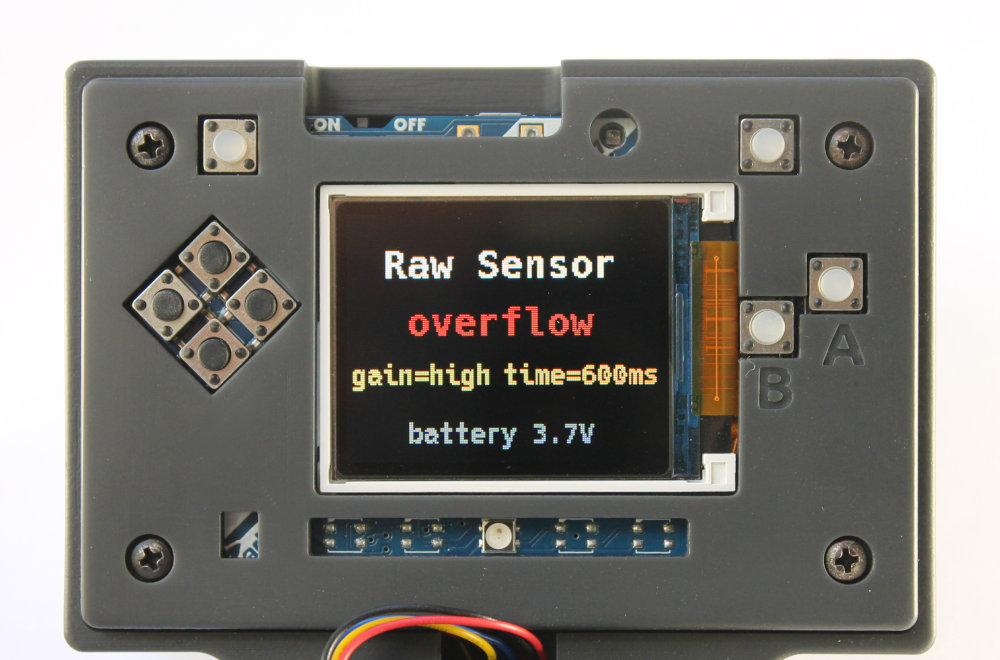
- The "Raw Sensor" screen displays a real-time count of values returned by the sensor along with the current gain and integration time settings for the sensor. An example is shown below.
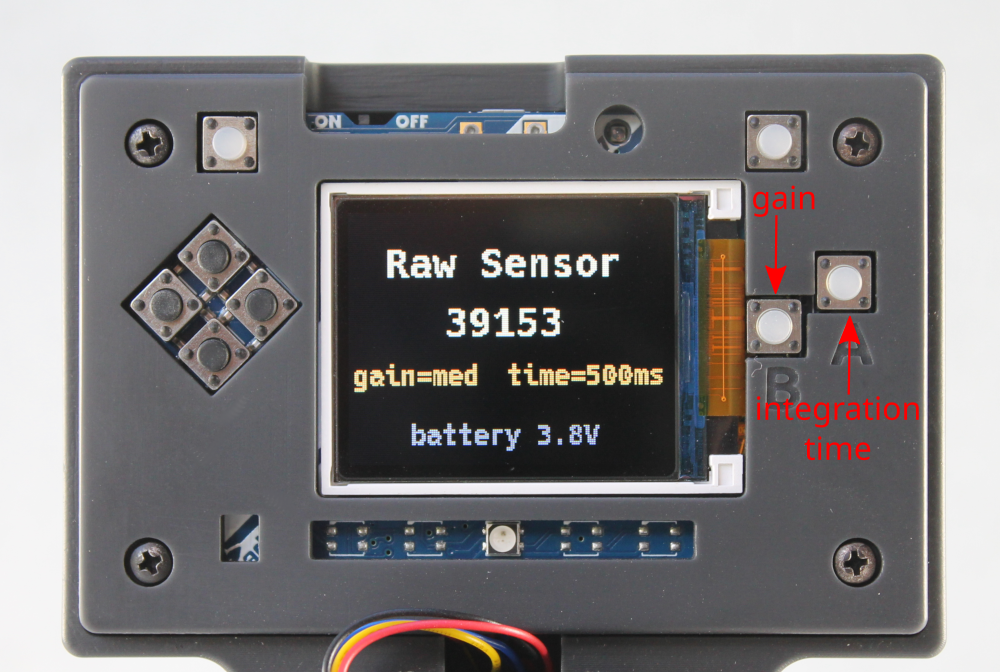
- The gain and integration time settings can be adjusted using the A and B buttons on the right side of the colorimeter
- Button A adjusts the integration time. Press to cycle through the options
- Button B adjusts the gain. Press to cycle through the options
- Once these are set how you want, press the Menu button at the top again to exit the screen
Selecting the optimal gain and integration time for your colorimetric assay
Each colorimetric assay uses an LED wavelength that best matches the absorbance of the analyte. For example, when measuring ammonia the user would select the 630nm LED, whereas for nitrate, a 520nm LED is used. For different LEDs and colorimetric assays, the optimal light sensor settings may be different. Check out the video below and read through the following tips for selecting the right settings for your colorimeteric assay.
- The first step is to check the Raw Sensor screen and examine the count values returned by the sensor
- The goal is to adjust the gain and integration time to achieve the highest possible count from the sensor without getting an overflow error message
- Optimizing the settings will give you the widest range of values returned by the sensor and thus the highest resolution for your measurements
- For example in our preliminary tests we found that the optimal settings for the 520nm LED are [gain=med and time=600ms]. However, with the 470nm LED, we found that the optimal settings are [gain=high and time=400ms].
- When adjusting the settings, insert a 'blank' sample for the test you plan to perform into the colorimeter. However, it is possible to achieve satisfactory results using no sample or an empty cuvette
- Any blanking data stored in the device will be deleted when gain or integration time are adjusted so you will need to re-blank
Setting a default gain and integration time in firmware
The default value for the gain and integration time can be set in the configuration json file on the device as described on the page "Customizing configuration and calibration files"
William Dickson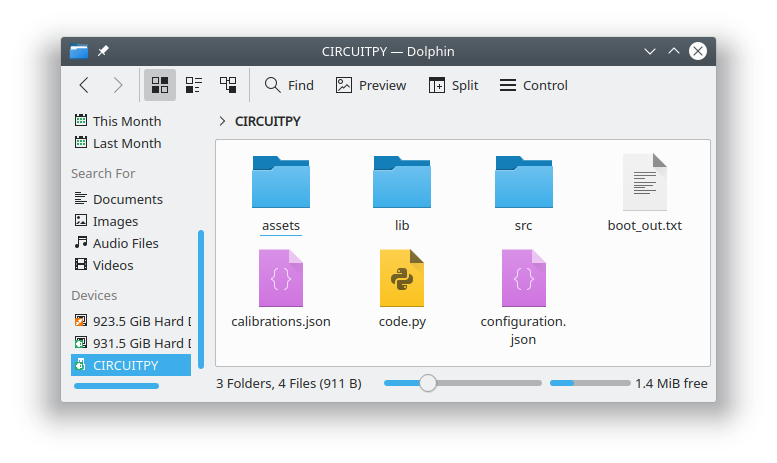

Open Colorimeter Product Guide
Documentation site for the Open Colorimeter, Multi-Channel Colorimeter, UV Open Colorimeter & Open Colorimeter Plus
Product Guide Home Page